13 Genius Budget-Friendly DIY Puppy Gates That Look Amazing (And Save You a Fortune)
Bringing home a new puppy is pure joy—until you discover they’ve turned your favorite rug into a chew toy or decided the stairs are a personal playground. Store-bought gates are practical, but the good ones cost a small fortune. And honestly, some of them look like they belong in a hospital, not your cozy living room.
Over the years, I’ve built (and rebuilt) more puppy barriers than I can count. I’ve learned that the best gates don’t have to cost a lot—they just need to be clever, sturdy, and match your style. I’ve rounded up my absolute favorite DIY ideas that are kind to your wallet and your home décor. These projects range from super simple (fifteen minutes, tops) to slightly more involved weekend builds. Your puppy will be safe, and your space will still look like you (not a kennel).
Grab your toolbox, check your recycling bin, and let’s get building. Your floors will thank you.
1. The Farmhouse Barn Door Gate (Wooden Planks + Hinges)
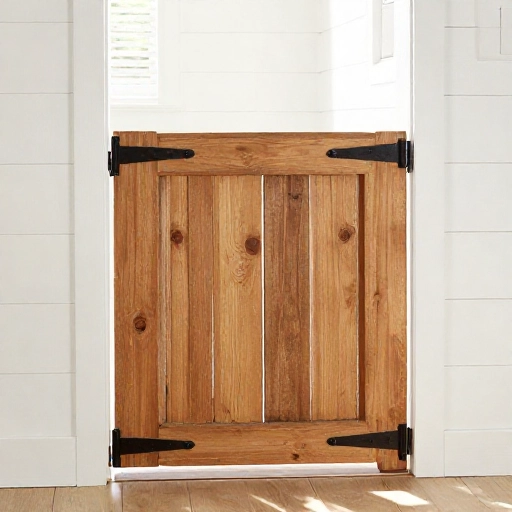
This is my absolute favorite because it looks intentional. You take 3-4 reclaimed fence pickets from the hardware store (they’re usually under $2 each) and attach them horizontally to two vertical support boards. Add a simple sliding bolt latch, and you have a chunky, rustic gate that matches farmhouse décor perfectly.
To make it fit perfectly in a doorway, measure the opening first. Keep the gate slightly narrower than the opening to allow for swing clearance. Use strong hinges that can support the weight of the wood, and make sure the latch is on the side where your puppy can’t reach it.
This one doubles as a visual barrier, which is great for puppies who get anxiety when they can’t see you. They’ll learn to settle down while still feeling part of the family action. Best of all, a few coats of paint can match this to any room.
- Cost: $10–$15
- Skill Level: Beginner
- Best For: Doorways and wide openings
2. The Tension-Mounted Shower Curtain Gate (No Screws Needed)
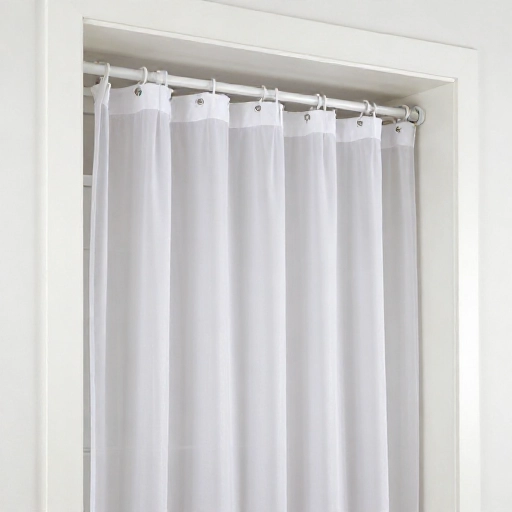
For renters or anyone who hates drilling holes, this is a lifesaver. Grab a heavy-duty tension shower rod and pair it with a cute, washable fabric shower curtain. Install the rod between two walls (usually in a hallway or doorway), and hang the curtain. It’s a soft barrier that keeps puppies in without a hard door.
I love that you can swap the curtains out with the seasons or when they get dirty. Just toss them in the washing machine and you’re done. It’s also completely silent—no more slamming gates waking up the baby.
Make sure the fabric is thick enough that your puppy can’t push through it. A canvas or duck cloth curtain is perfect. For extra security, add a few small binder clips at the bottom to weigh the fabric down.
- Cost: $15–$20
- Skill Level: Super Easy
- Best For: Apartments and temporary solutions
3. The PVC Pipe Folding Gate (Lightweight & Portable)
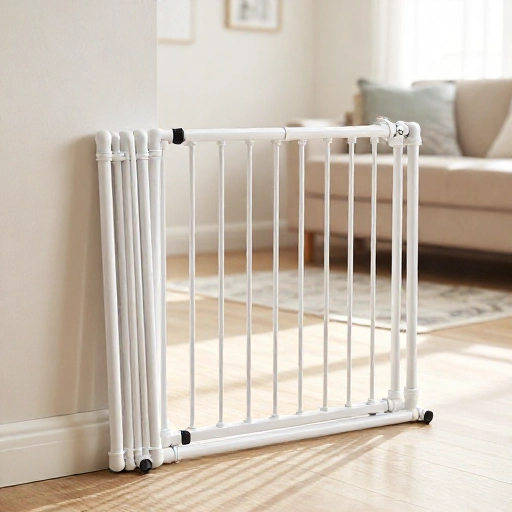
This is the ultimate project for a handy parent who wants something that can move around the house. You’ll need PVC pipes, corner connectors, and T-joints. Cut the pipes to your desired height and width, then assemble them into a freestanding frame. To make it foldable, just use hinges on the vertical joints.
Cover it with a mesh fabric or zip ties to keep small puppies from squeezing through the gaps. The beauty of PVC is that it’s weatherproof, so you can also use this outside to block off a patio area. It’s incredibly lightweight, making it easy to pick up and move when company comes over.
If you want to get fancy, you can spray-paint the PVC with a plastic-safe primer to make it look like metal. Nobody will ever guess it’s plumbing pipe.
- Cost: $20 (if you buy a 10-foot pipe)
- Skill Level: Intermediate
- Best For: Flexible spaces and travel
4. The Secondhand Crib Gate (Free or Nearly Free)
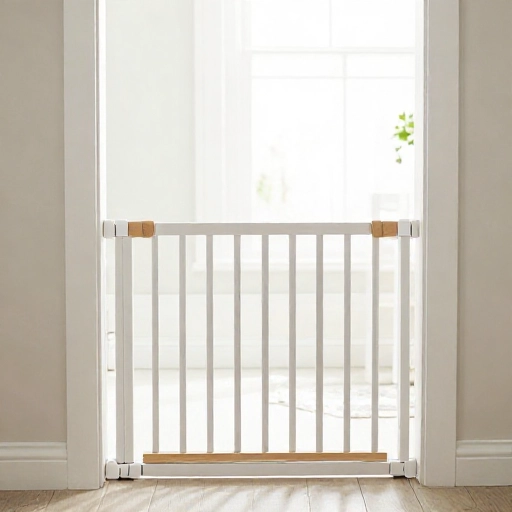
Here’s a secret: used baby cribs are practically given away on marketplace sites. Instead of a traditional gate, take one side of a wooden crib (the drop-side panel) and attach it to a wall with hinges. It creates a tall, sturdy gate that’s perfect for large breed puppies.
The vertical slats are usually spaced too closely for most breeds, so you don’t have to worry about heads getting stuck. They are also naturally taller than a standard pet gate, making them perfect for jumpers. You can sand it down and paint it to match your trim.
It’s a bit of a heavy lift, but the sturdiness is unmatched. Once your puppy is an adult, you can repurpose the panel as a decorative headboard or a shoe rack. It’s the ultimate upcycle.
- Cost: $0–$10
- Skill Level: Moderate
- Best For: Large breeds and jumpers
5. The Folding Screen Gate (Decor Meets Function)
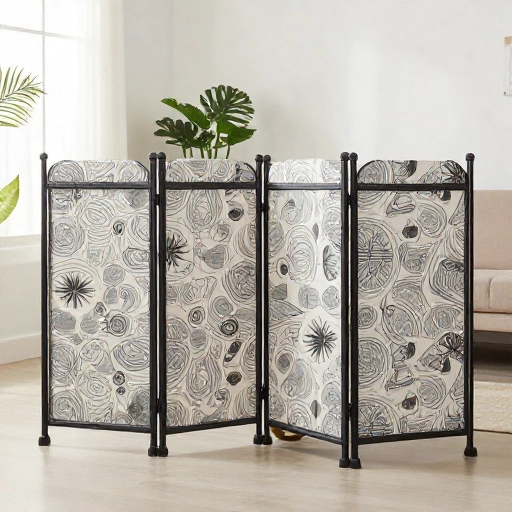
Buy a simple three-panel folding room divider from a thrift store or big-box store. These are usually made of wood, rattan, or fabric. Just set it up in a doorway and fold it into a “V” shape to block the path. It’s a no-drill, zero-damage solution that looks like a piece of art.
To make it more secure, you can zip-tie the panels together at the hinges or add a small hook-and-eye latch on the edge that touches the wall. This prevents a determined puppy from pushing the panels apart with their nose.
I love using these in open-concept homes where a permanent gate looks out of place. When you don’t need it, just fold it flat and tuck it behind the couch.
- Cost: $20–$30
- Skill Level: Super Easy
- Best For: Stylish homes and renters
6. The Tension Rod & Fabric Mesh Gate (The Budget Classic)
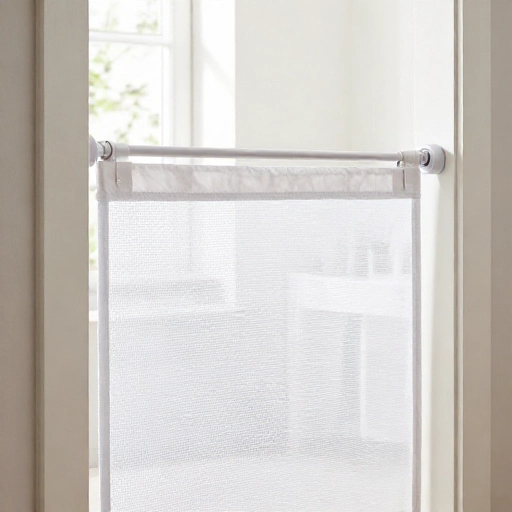
This is the stripped-down version of the shower curtain gate, but even cheaper. You only need a spring-tension rod and a piece of mesh fabric or an old sheet. Cut the fabric to size, hem the top edge to create a pocket for the rod, and slide it on. That’s it.
The tension rod wedges tightly between the door frame, and the fabric hangs down to the floor. For puppies, this is a great visual deterrent, and it prevents them from getting underfoot in the kitchen. You can even use a clear vinyl tablecloth if you want to see through it.
Just make sure to check the tension every few days, as the rod can slip if the frame is uneven. A little bit of rubber grip pad on the ends solves that problem instantly.
- Cost: $8
- Skill Level: Beginner
- Best For: Doorways on a budget
7. The Wooden Pallet Gate (Rustic & Industrial)
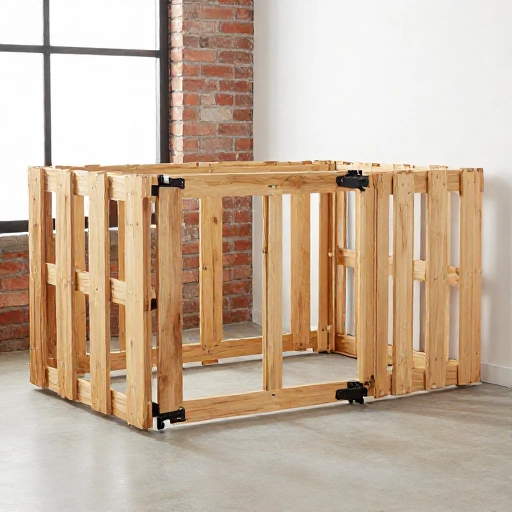
Find a free wooden pallet, sand it down thoroughly to avoid splinters, and cut it to size with a saw. You can keep it as-is for a rustic look or paint it a bright color for a pop of fun. Attach heavy-duty hinges to the wall and screw the pallet onto the hinges.
This is a very heavy gate, so it’s best for areas where you don’t need to open and close it frequently. You can also just lean it against the wall and use a heavy brick on the other side to hold it in place. It’s a rugged, man-cave style solution.
To make it look more polished, add a wooden “frame” around the pallet edges. It hides the rough cuts and gives it a custom furniture look.
- Cost: $0–$5 (for screws)
- Skill Level: Moderate
- Best For: Gaps and larger openings
8. The Over-the-Door Hanging Gate (Space Saver)
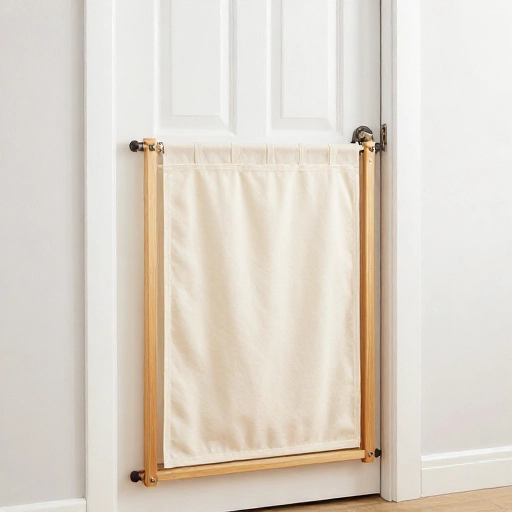
If you don’t have wall space to mount a gate, use the door itself. You can buy a tension rod that fits over the top of the door (like a towel rack that hangs). Then, hang a piece of fabric or a lightweight wooden frame from it. This creates a swinging gate that doesn’t require any holes in your walls.
This is perfect for blocking off a nursery or an office. The gate swings freely with the door, so it’s easy to move through. Just make sure the door hinge can support the weight of the hanging object.
Use a canvas drop cloth for a cheap and durable option. You can even paint a saying or your puppy’s name on it for a personalized touch.
- Cost: $15
- Skill Level: Easy
- Best For: Renters and doorways
9. The Stacked Storage Cube Gate (The “Furniture” Look)
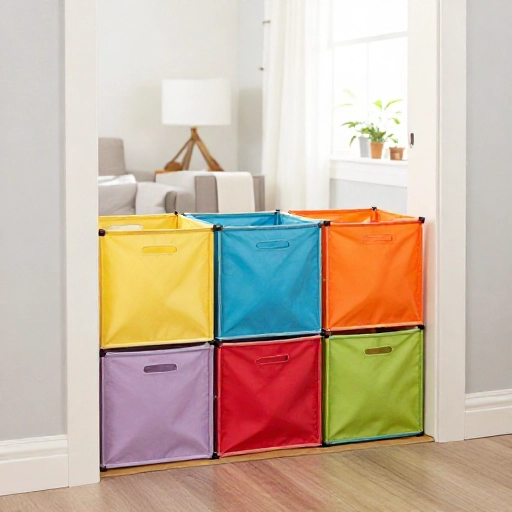
Buy a few wire storage cubes (the 13-inch ones used for closets) and zip-tie them together in a row. They come in white, black, or silver, and they look like a modern shelving unit. You can stack them two high for a taller barrier or just one high for a low hurdle.
The squares are usually 13×13 inches, which is too large for small puppies. So, zip-tie a piece of clear acrylic or wire fencing to the backside to fill the gaps. This makes it look like a designer room divider.
This is a great solution for creating a “playpen” area in the middle of a room. Just arrange them in a square and leave an opening for a door.
- Cost: $20
- Skill Level: Easy
- Best For: Playpens and modular setups
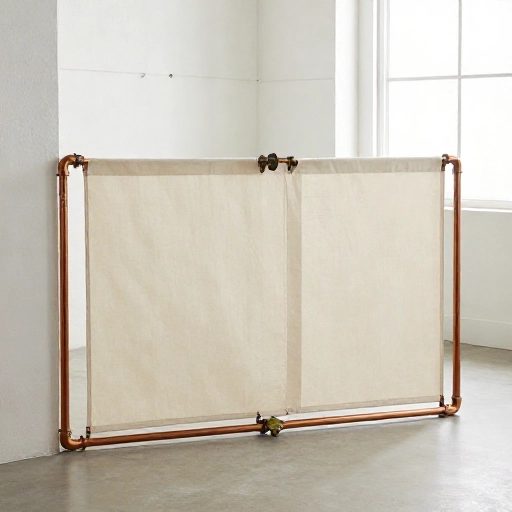
10. The Copper Pipe & Cloth Gate (Industrial Chic)
For a more polished look, use copper or steel pipes instead of PVC. You can find pre-cut pipes at the hardware store and assemble them with flange fittings that screw into the wall. This looks like a steampunk or industrial designer piece.
Hang a heavy canvas curtain or even a piece of burlap from the top pipe using drapery clips. The metal pipes are strong enough to handle even the most rambunctious puppies. It’s heavy, so it doesn’t wobble.
Copper is more expensive, but you can achieve the same look with steel pipes and spray-paint them bronze or gold. It’s a stunning gate that guests will compliment.
- Cost: $35–$50
- Skill Level: Intermediate
- Best For: High-end aesthetics
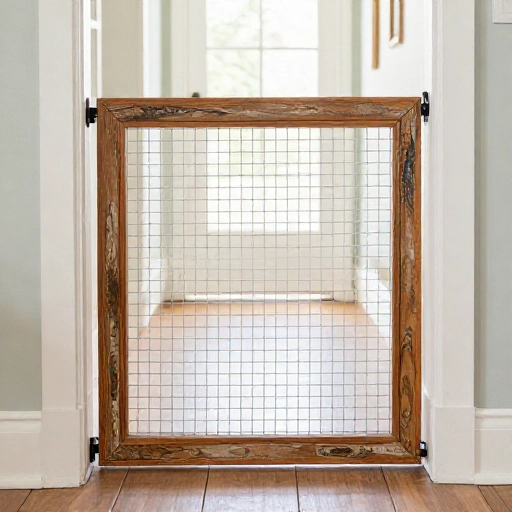
11. The Upcycled Picture Frame Gate (Vintage Charm)
Hit up a thrift store and buy two large, sturdy picture frames with strong wooden edges. Remove the glass and backing. Hinge the frames together at the sides so they fold like a book. Then, stretch a piece of decorative wire mesh or chicken wire across the back and staple it in place.
This creates a very unique, shabby-chic gate. You can paint the frames in pastel colors or leave them with a distressed wood finish. It’s lightweight and easy to move around the house.
Because the frames are hollow in the middle, it’s a great option for seeing through the gate. It’s also a fun conversation starter for when you have guests over.
- Cost: $10
- Skill Level: Moderate
- Best For: Small gaps and decorative spaces
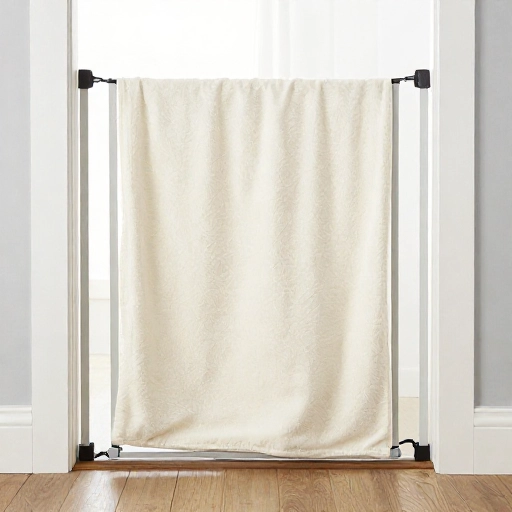
12. The Bungee Cord & Blanket Gate (The 5-Minute Hack)
In a pinch, I have used this trick countless times. Take a large, lightweight blanket or comforter and attach it to the door frame using heavy-duty bungee cords. Hook the cords to the top corners and the bottom corners, creating a taut “slackline” effect.
This isn’t the prettiest option, but it works in an emergency. It’s perfect for traveling or when you need a quick barrier while you’re visiting friends with a puppy. It’s also completely foldable and fits in your glovebox.
Make sure the blanket is stretched tight enough that the puppy can’t crawl under it. Use at least four bungee cords to keep it secure. It’s the ultimate “just in case” gate.
- Cost: $5
- Skill Level: Beginner
- Best For: Travel and emergencies
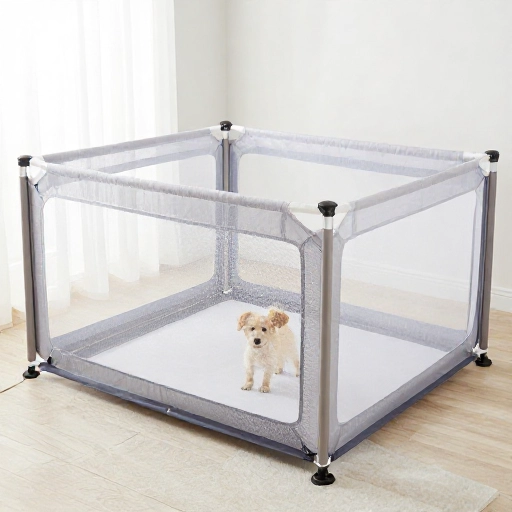
13. The Skip-the-Gate Solution: The Baby Play Yard (DIY Mesh Yard)
Instead of a gate, create a contained “yard” using plastic garden fencing and PVC pipes. You can buy a roll of plastic mesh fencing (the kind you use for gardens) and zip-tie it to a frame of PVC pipes or even tall tomato stakes. This creates a huge, enclosed area for your puppy to play in.
This is better than a gate if you need to keep the puppy contained in the middle of a large room. You can make it as large as you want. It’s super easy to fold down when guests come over, and the materials are weatherproof for outside use.
Attach a simple hook-and-loop strap for a door. This is the most cost-effective way to build a large kennel without paying kennel prices.
- Cost: $25
- Skill Level: Easy
- Best For: Large play areas
Final Thoughts: Building for Your Best Friend
You don’t need to spend a hundred dollars to keep your puppy safe. With a little creativity, you can turn everyday items into functional, stylish barriers that actually enhance your home. The best part is that these DIY projects are just as much about you as they are about the puppy—they let you flex your creativity and save money for the important stuff (like treats and toys).
Remember to always prioritize safety. Sand down rough edges, secure everything tightly, and make sure there are no gaps where tiny paws could get caught. Start with the easiest project on this list, and you’ll gain the confidence to tackle the more complex builds later. Your puppy might not appreciate the design, but they’ll definitely appreciate having a safe space to call their own.
Frequently Asked Questions
1. What is the cheapest material to use for a DIY puppy gate?
PVC pipes and tension rods are the cheapest materials. You can build a functional gate for under $15 using just a tension rod and an old sheet or curtain. Free pallets are also a great option if you can find them.
2. How do I make a DIY puppy gate stable for a large dog?
For large dogs, you need weight and friction. Use heavy materials like wood, metal pipes, or a crib panel. Ensure hinges are screwed into wall studs, not just drywall. A tension gate is not ideal for big breeds.
3. Can I use a baby gate for a puppy?
Yes, but you need to check the spacing. Some baby gates have wide slats that puppies can squeeze through. For small breeds, you may need to zip-tie mesh or plexiglass to the gate to close the gaps.
4. How do I keep my puppy from jumping over the gate?
Make the gate taller than your puppy’s vertical jump reach—at least 3 feet for most breeds, and 4 feet for jumpers. Alternatively, install the gate higher off the ground and put a lower barrier behind it, but ensure they can’t get stuck.
5. Are tension rod gates safe for puppies?
They are safe for small and medium puppies who don’t push hard. However, a determined chewer might pull the fabric down. Always check the tension weekly and never leave a puppy unsupervised with a fabric gate until they are fully trained.