12 Stunning DIY Dog Crate Covers For Small Spaces (Save Floor Space & Look Amazing)
If you’re like me, you love your dog but hate how their wire crate sticks out like a sore thumb in a tiny apartment or studio. A plain metal crate eats up visual space and always feels cold. Enter the DIY dog crate cover. Not only does it hide the ugly metal, but in a small space, the right cover can actually make your room feel bigger, softer, and more put together.
I’ve spent way too many evenings researching and testing budget-friendly covers that don’t require sewing skills or a giant workshop. And here’s the good news: you don’t need to spend $80 on a custom cover. With a little creativity and maybe $20 in materials, you can turn that crate into a stylish piece of furniture that blends in or stands out—your call.
Below, I’m sharing my 12 favorite DIY dog crate cover ideas for small spaces. Each one is vetted for airflow, easy cleaning, and that “wow, where did you get that?” look. Grab a measuring tape and let’s get started.
1. The Tension Rod Curtain Cover (No Tools, No Fuss)
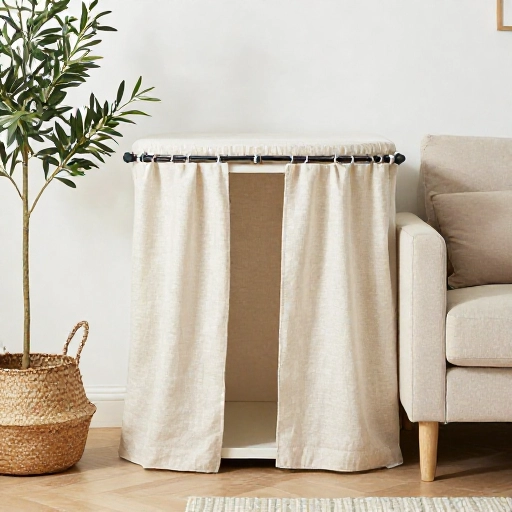
This is the easiest project on the list and the one I recommend to every first-time DIYer. All you need is a tension rod that fits inside the top of your dog crate (or along the front if you want flaps) and a piece of fabric you love. I used a leftover blackout curtain from my last apartment and it instantly softened the whole corner.
For small spaces, this works because you can tuck the rod close to the wall and let the fabric hang straight down, which visually streamlines the crate. Plus, you can slide the fabric open for playtime or cleaning without any hardware. Just make sure to leave the back and sides partially open for airflow—dogs need that cross breeze.
If your crate is against a wall, install two rods: one on top for the top cover and one on the front for a cafe-style curtain. I promise it looks like a custom piece, not a crate.
2. No-Sew Tablecloth Slipcover (Perfect for Renters)
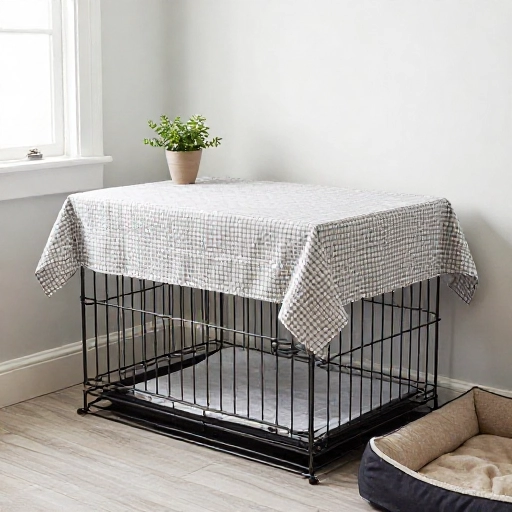
When I lived in a rental with a strict no-drill policy, this was my go-to. Take a pretty tablecloth—cotton or linen blends work best—and drape it over the entire crate. Use fabric tape or iron-on hem tape to create seams, or just tuck and fold like a fitted sheet. For a more tailored look, wrap the fabric around the crate and secure it with safety pins or fabric ties at the corners.
The beauty of this method? You can cover the top, sides, and front all at once, and when it gets hairy or smelly (it will), you just throw it in the wash. In a small space, I like to choose a tablecloth that matches my curtains or bedding so the crate visually disappears into the room.
A quick tip: cut a rectangle out of the front where the crate door is so your dog can see out and feel less confined. Then attach a small flap with velcro if you need to darken the crate for nap time.
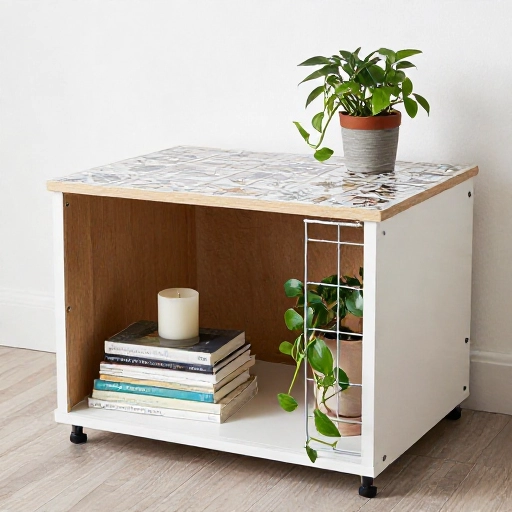
3. Plywood Topper with Peel-and-Stick Tile (Doubles as a Shelf)
If your small space is really tight, every surface needs to work double duty. That’s why I love turning the top of a dog crate into a usable shelf. Grab a piece of plywood cut to the exact footprint of your crate. Sand the edges, then stick on peel-and-stick tiles—marble, terrazzo, or wood-look all work great.
Place the plywood right on top of the crate (no nails needed if you use non-slip shelf liner underneath). Then set a plant, a stack of books, or your keys on top. Suddenly your dog crate is a functional side table. Just make sure the plywood overhangs by no more than an inch on each side so it doesn’t tip.
This cover is a game-changer for studio apartments where floor space is at a premium. You get storage and style in one afternoon project.
4. Macrame or Woven Panel (Boho Vibe, Airy Feel)
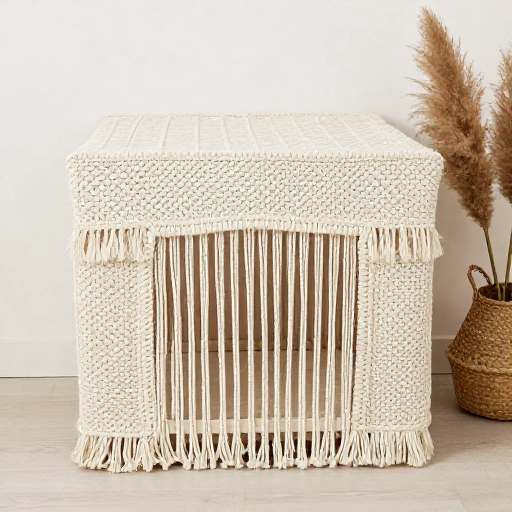
For a boho look that still lets air flow freely, a macrame panel or woven cane webbing is stunning. You can buy a large macrame wall hanging and drape it over the top and front of the crate, or get creative with a piece of cane webbing attached to a light wooden frame.
In small spaces, bohemian textures actually add depth without making the room feel heavy. I draped a thrifted macrame table runner over my crate and used tiny command hooks to keep it in place. The gaps in the weave mean my dog can peek out and I never worry about overheating.
If you’re handy with knotting, you can make your own macrame panel to fit the exact front dimensions. But honestly, a pre-made woven tapestry works just as well and costs under $25 on most days.
5. Wooden Slat Cover (High-End Look for Small Apartments)
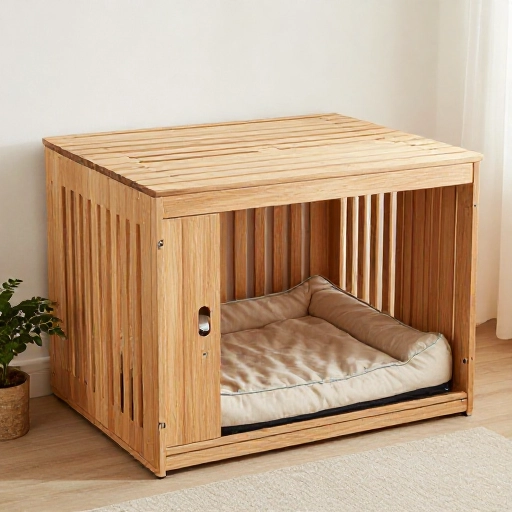
This one looks straight out of a design magazine but is surprisingly doable. Measure the front and sides of your crate, then cut thin wooden slats (like 1×2 boards) to length. Attach them to a light frame or directly to the crate using zip ties or small screws. Space them evenly—about 1 to 2 inches apart—for a modern, mid-century feel.
In a small space, vertical slats draw the eye upward and make the crate read as intentional furniture rather than a pet cage. I stained my slats a warm walnut color and left the top open for airflow. It now looks like a designer room divider that happens to hold a dog bed.
Fair warning: this project requires a saw and a bit more patience. But if you have a small balcony or driveway, it’s totally doable in a weekend. And the result is stunning in photos—Pinterest gold.
6. Fitted Sheet Hack (The Lazy Genius Cover)
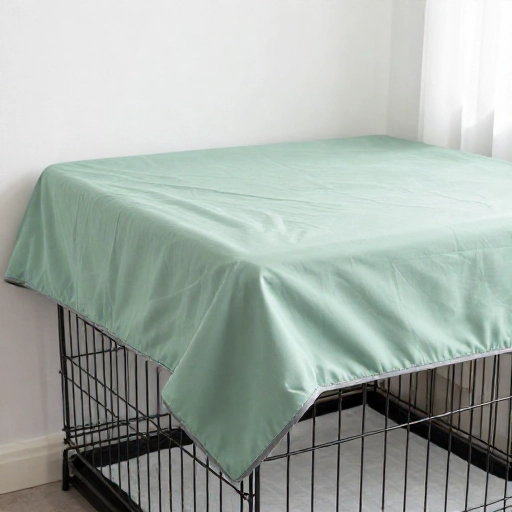
Not every DIY has to be a big production. My favorite lazy-day cover is a twin or full fitted sheet stretched over the entire crate. The elastic corners hold it in place without any cutting or sewing, and you can pull it tight for a smooth, modern silhouette.
For small spaces, I recommend a solid color or subtle pattern that blends with your walls. That way the crate becomes a soft, almost invisible block instead of a wire monster. When it’s time to wash, just strip it off like a bedsheet and toss it in the machine.
One trick: cut a small slit for the door handle and use a hair tie to secure the front flap open. That way your dog can come and go freely, but you still get the covered look.
7. Sliding Barn Door Style Panel (For Crate in a Tight Corner)
If your dog crate is wedged between a wall and a piece of furniture, a front-opening cover can feel clunky. Instead, make a sliding panel that moves sideways—like a mini barn door. Use a thin piece of plywood or a canvas stretched on a frame, and attach small casters or a simple track along the top of the crate.
This idea is brilliant for small spaces because you can slide the cover open without needing clearance in front of the crate. When closed, it completely hides the wire front and adds a rustic, farmhouse touch. I painted mine a matte black for contrast against a white wall.
You can build a basic track from a curtain rod and some S-hooks, or go with a self-adhesive sliding door kit from the hardware store. Either way, this cover makes a big statement in a tiny footprint.
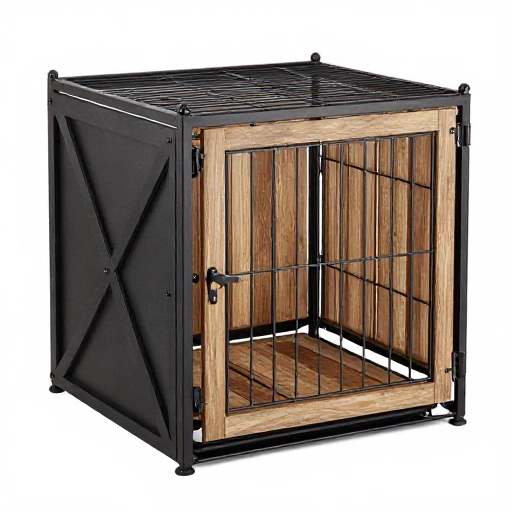
8. Washi Tape & Contact Paper Wrap (Renter Friendly, Zero Damage)
Sometimes the best DIY is the one you can peel off when you move out. Enter washi tape and contact paper. Wrap the metal bars of your dog crate with patterned contact paper or colorful washi tape to create a custom color block effect. It costs less than $10 and takes maybe an hour.
In small spaces, this adds personality without extra bulk. I covered the bottom half of my crate with a wood-grain contact paper and left the top half open for visibility. It looked like a cute little picket fence around my dog’s bed.
Just be careful with tape adhesive—some dogs like to chew. I recommend wrapping the outside only and keeping an eye on your pup for the first few days. If they show interest, switch to a pet-safe paint instead.
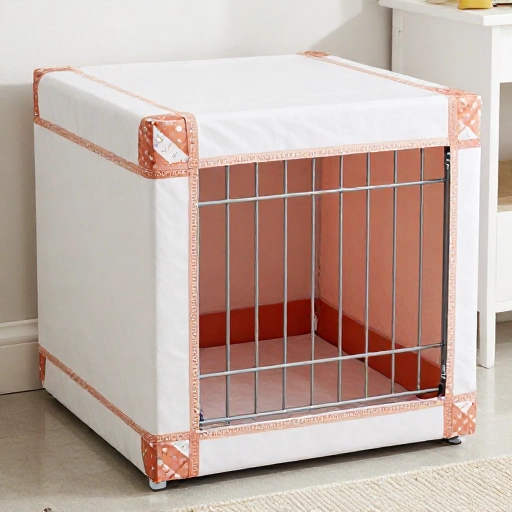
9. Fabric Panels with Velcro Tabs (Easy On, Easy Off for Cleaning)
If you want removable panels that snap on and off without fighting with rods or ties, velcro is your best friend. Measure the top, front, and sides of your crate, cut fabric panels to fit, then attach self-adhesive velcro strips around the crate edges and matching strips on the fabric.
This method gives you the tailored look of a custom cover but the convenience of quick removal. I made three separate panels—top, front, and one side—so I can wash just the dirty section or open one side for a breeze.
For small spaces, choose lightweight cotton or canvas in a light color. It keeps the crate from feeling heavy and visually cluttered. And when guests come over, you can pop the front panel off entirely for a more open look.
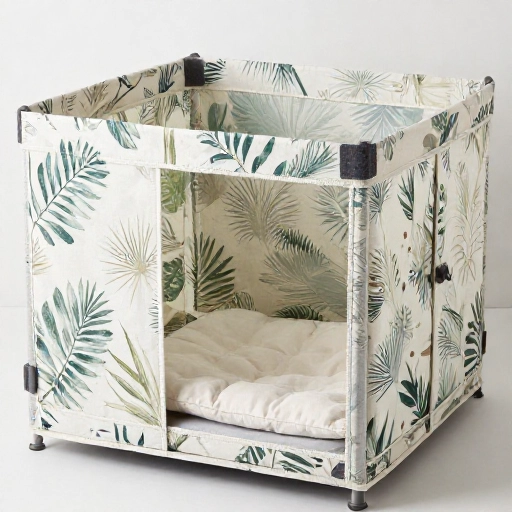
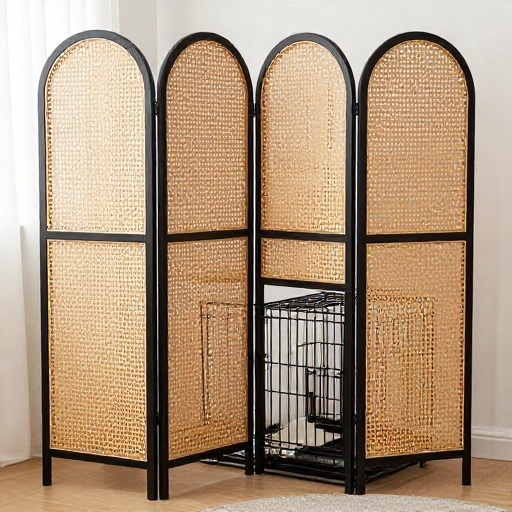
10. Foldable Room Divider Panels (Double Duty Decor)
Here’s a clever one: use a foldable room divider or freestanding privacy screen as a crate cover. You can position it in front of or around the crate to hide it completely while adding a decorative element to your small space. This works especially well if your crate sits in a corner of a studio apartment.
I found a vintage three-panel screen at a thrift store for $15 and wrapped it with floral fabric. Now it hides the crate when guests visit and folds flat against the wall when not needed. The best part? No DIY skills required—just style it.
Make sure the screen allows some airflow by leaving a few inches of space between the screen and the crate. And anchor the screen to the wall if you have a rambunctious dog who might knock it over.
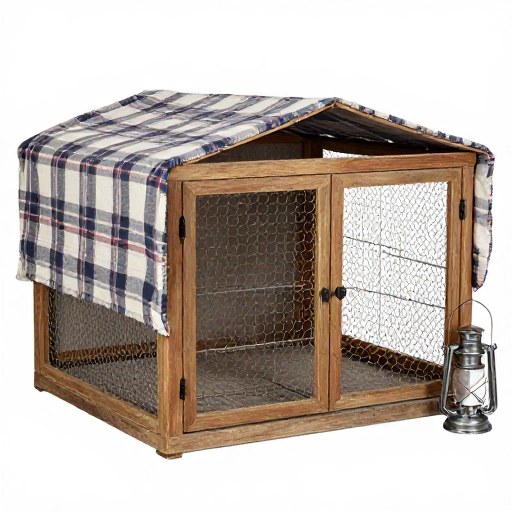
11. Rustic Wood Frame with Chicken Wire (Industrial Farmhouse Style)
For a cover that’s as durable as it is pretty, build a simple wood frame with chicken wire inserts. Cut four pieces of wood to make a rectangular frame that fits over the front of the crate, then staple chicken wire to the back. Attach the frame to the crate with hinges or simply lean it against the front.
This gives you the look of a custom industrial dog den and hides the crate’s original wire door. In a small space, I painted the frame the same color as my floor trim so it felt like built-in furniture. Then I hung a small wreath on it for holidays.
Chicken wire has larger gaps than standard crate wire, so it feels more like a decorative screen. But check for sharp edges and cover them with fabric tape or sandpaper. Safety first, cuteness second.
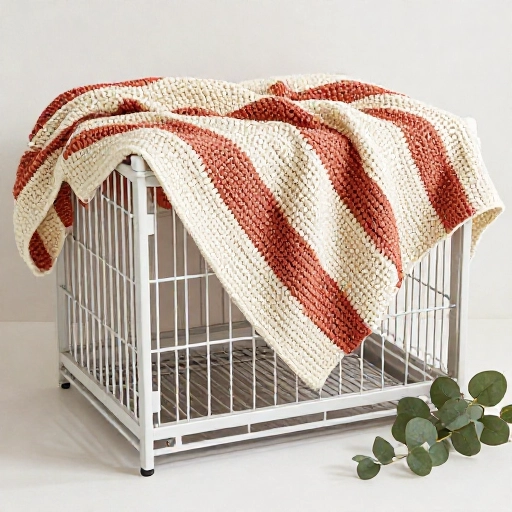
12. Crochet Blanket or Throw Cover (Cozy & Breathable)
Last but not least, my personal favorite for winter months: drape a chunky crochet blanket or a large knit throw over the top and sides of the crate. The holes in the crochet allow plenty of airflow while giving the crate a warm, cabin-like feel.
In a small space, this works because the blanket softens hard edges and adds texture without taking up any floor space. I used an old cream-colored crochet blanket from my grandma’s linen closet and it transformed my dog’s crate into a cozy reading nook corner.
Just be sure the blanket isn’t too heavy and doesn’t hang low enough for your dog to pull through the bars and chew. I secure mine with a few wooden clothespins on the back side, out of reach.
Conclusion: Turn That Eyesore Into Eye Candy
Small spaces demand creativity, and your dog crate cover is the perfect place to start. Whether you go for a no-sew tablecloth hack or a full wooden slat build, the goal is the same: make the crate feel like a home decor choice, not a pet necessity. I’ve tried nearly all of these ideas in my own tiny apartment, and each one brought a little more calm to the room.
Pick one idea that matches your skill level and budget, measure twice, and let your dog test it out. Most of these projects take less than an afternoon and cost under $30. Your pup will love the cozy den, and you’ll love the extra floor space (or at least the illusion of it).
FAQ: DIY Dog Crate Covers for Small Spaces
1. Is it safe to cover my dog’s crate completely?
No, never cover the crate entirely. Dogs need ventilation and a view. Always leave at least one side or a portion of the front open for airflow. If your dog pants heavily or shows signs of overheating, remove the cover immediately.
2. What materials are best for small space crate covers?
Lightweight, breathable fabrics like cotton, linen, or light canvas work best. Avoid heavy vinyl or thick blankets that trap heat. For hard surfaces, use thin plywood or peel-and-stick tiles that don’t add bulk.
3. How do I measure my dog crate for a DIY cover?
Measure the width, depth, and height of the crate, including the wire bars. Add 1–2 inches for seam allowances if using fabric, or cut wood panels to the exact external dimensions. For a top shelf, measure the top footprint precisely and add a small overhang if desired.
4. Can I make a crate cover without sewing or power tools?
Absolutely. Try the tension rod curtain, fitted sheet hack, or washi tape wrap. All three require no sewing and no tools beyond scissors. Tablecloth slipcovers with fabric tape are also a great no-sew option.
5. How do I clean a DIY dog crate cover in a small apartment?
Most fabric covers can be thrown in the washing machine on a gentle cycle. For wood or rigid panels, wipe with a damp cloth and mild soap. Always let covers dry completely before putting them back on the crate to prevent mildew, especially in humid small spaces.