7 DIY Wooden Dog Bunk Beds You Can Actually Build This Weekend
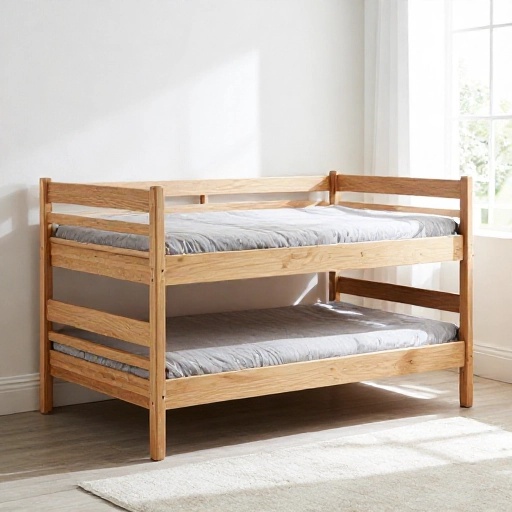
If you have more than one dog, you know the struggle. They want to be near you, but they also want their own space. And if you buy those flimsy fabric beds, they end up looking like a crumpled mess in a week. That’s why I started building wooden bunk beds for dogs. They’re sturdy, they look great in a living room, and they give your pups a cool place to crash without taking over your whole floor plan.
I’ve gathered seven different designs that range from super simple (like, just plywood and screws) to a bit more involved with stairs and storage. Each one is totally buildable with basic tools. I’m going to walk you through the core idea behind each build, the best wood to use, and the little details that make a big difference. Let’s get building.
1. The Classic Stacked Platform: Simple and Sturdy
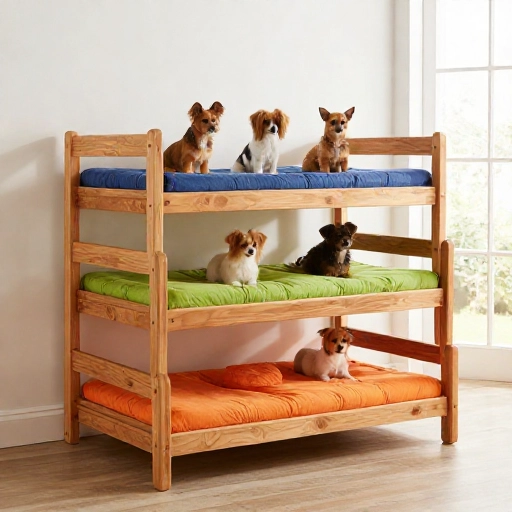
This is the first one I ever built, and honestly, it’s the perfect weekend project. It’s just two rectangular boxes stacked on top of each other, held up by four solid corner posts. The top dog gets the penthouse view, and the bottom dog gets a cozy cave feeling.
For this build, I used 2x4s for the frame and 3/4-inch plywood for the sleeping platforms. You want the plywood to be thick enough so it doesn’t bow in the middle when a heavy dog jumps up. I also added a small lip on the top edge so the top dog feels secure and doesn’t roll off in the middle of the night.
One tip? Sand everything before you assemble it. Once it’s together, getting into the corners with sandpaper is a pain. And don’t forget to round over the edges with a router or just some sandpaper. Dogs like to rest their chins on the edges, and a sharp corner is no good.
Finish it with a non-toxic sealant or just a good coat of wood conditioner. You can even paint the outside frame but leave the sleeping surfaces bare wood for easy cleaning.
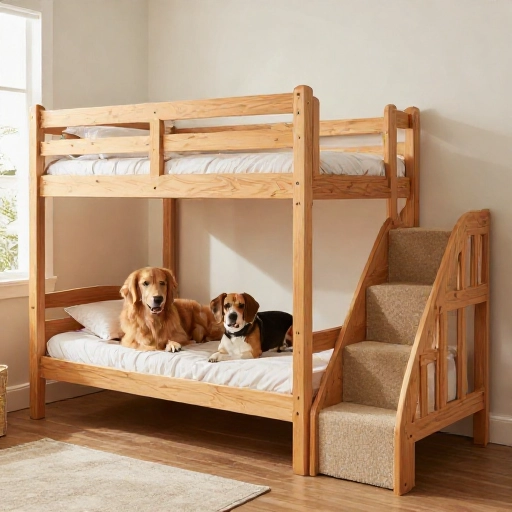
2. The Staircase Bunk: Perfect for Senior Dogs
Not every dog can jump up to the top bunk. If you have a senior pup or a small breed, you need stairs. This design integrates the stairs right into the side of the bunk bed, so it doesn’t take up extra floor space. Each step is actually a storage cubby, which is a huge win for storing toys or leashes.
I built the stairs first as a separate box, then attached it to the main frame. The trick is to make sure the stair treads are wide enough—at least 10 inches deep—so your dog doesn’t feel like they’re climbing a ladder. The rise between steps should be low, around 6 to 7 inches, depending on your dog’s height.
For the wood, I recommend using Baltic birch plywood for the stairs. It’s got a smooth finish and doesn’t have voids (gaps) in the middle, which makes it stronger for the cuts you’ll need to make. Use wood glue and pocket holes to attach the treads. It makes the whole thing rock solid.
I added a little traction mat on each stair tread. It’s just a peel-and-stick rubber mat cut to size. It gives my old lab the confidence to go up and down without slipping.
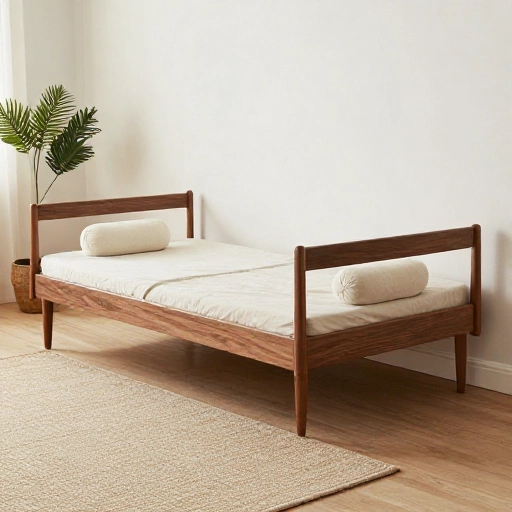
3. The Mid-Century Modern Leggy Bunk
If you want furniture that looks like it belongs in a design magazine, this is the one. Instead of boxy sides, this design uses tapered wooden legs and open space underneath. The two beds are spaced about 14 inches apart, and the whole thing sits up on taller legs, giving you a spot to slide a storage basket underneath.
This is a bit more advanced because you need to make angled cuts for the tapered legs. But don’t worry—you can cheat by buying pre-tapered furniture legs from a big-box store and just screwing them into a solid frame. I went with 3-inch thick pieces of solid pine for the frame to give it that substantial look.
The magic of this design is the finish. I used a dark walnut stain on the frame and left the plywood platforms natural. The contrast between the dark legs and the light wood makes it pop. It’s a great piece for a modern living room or a farmhouse-style home.
Just be careful with the legs. Make sure they are rated to hold the weight. I used heavy-duty metal leg plates to attach them, not just wood screws into the end grain.
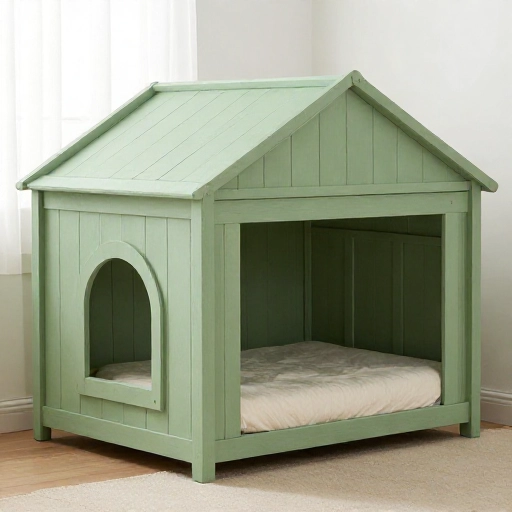
4. The Enclosed Cabin Bunk: Privacy for Anxious Dogs
Some dogs just want to feel hidden. This design has the bottom bed fully enclosed with a little archway entrance, like a cave. The top bed is open like a normal bunk. It gives your dogs options—one can hide, and the other can watch the world go by.
For the enclosure, I used 1/2-inch plywood for the sides and a 3/4-inch plywood top (which is the floor for the second bed). I built an archway using a jigsaw to cut a nice curve in the front panel. Make the archway wide enough for your dog to walk through comfortably without ducking.
Add a few ventilation holes in the back panel. They look cute (I made them in a bone shape using a hole saw), and they keep the air flowing so the bottom bunk doesn’t get stuffy. Put a nice soft cushion inside, and your dog will treat it like their personal fortress.
I would suggest making the front panel removable. I used simple cam locks to attach it. That way, when you need to wash the bedding or vacuum out the fur, you can just pop the whole front off.
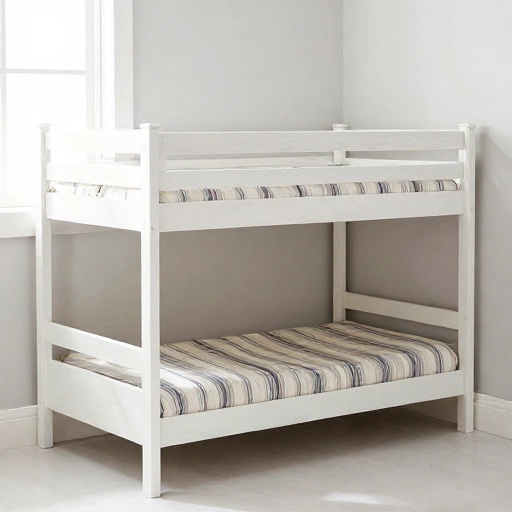
5. The Corner Unit Bunk: Maximize Small Spaces
Have an awkward corner in your living room? This bunk bed is designed specifically to fit into a 90-degree corner. It’s shaped like a triangle, or more accurately, a pie slice. It’s a bit tricky to cut, but it saves so much space.
The frame is built with three vertical posts—one in the center and two against the walls. The sleeping platforms are cut to fit the corner. I recommend making a cardboard template first before cutting the wood. It’s a lot easier to adjust cardboard than it is to re-cut a sheet of expensive plywood.
For this build, I used a Kreg Jig to make pocket holes. This is essential because you’ll be joining wood at angles that are hard to clamp. The pocket holes let you screw everything together securely without seeing any hardware.
I also added a small shelf on the back wall, right above the bottom bed. It’s perfect for a water bowl or a little plant. Since it’s tucked in the corner, it feels really cozy and private for the dogs.
6. The Triple-Stack Bunk: For the Multi-Dog Household
Got three dogs? Or one big dog and two small ones? This build stacks three beds vertically. It’s a tall unit, so you have to make sure it’s anchored to the wall to prevent tipping. But if you have the vertical space, it’s a game-changer for floor space.
I used heavy-duty 4×4 posts for the corners on this one. The height makes it a bit more dangerous if it falls, so the extra wood is worth the money. I also added a wooden brace across the back that I screwed directly into a wall stud. Safety first, always.
The spacing between the beds is a bit tighter on this one—about 12 inches. That’s enough for a dog to sit up and look around, but it keeps the overall height manageable. The bottom bed sits about 4 inches off the floor.
To make it easier to clean, I made the platforms slide out like drawers. I just built simple wooden trays that rest on wooden rails. It’s a cool feature that makes washing the bedding super easy.
7. The Pallet-Style Rustic Bunk: Budget-Friendly and Charming
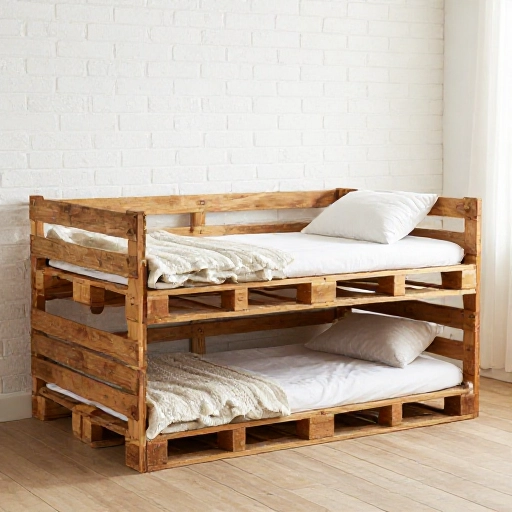
If you’re on a tight budget, this is the one for you. Instead of buying new lumber, I used heat-treated shipping pallets. They’re often free behind hardware stores. Just make sure they have the “HT” stamp, which means they are heat-treated and safe for indoor use (not chemically treated).
I took the pallets apart carefully with a pry bar, sanded them down to remove splinters, and then re-built them into a bunk bed. The wood is a bit rough and has that rustic, farmhouse charm that you just can’t fake with new wood.
The downside is that pallet wood can be warped. So, you have to be selective about which boards you use for the sleeping surfaces. Keep the straightest, most solid boards for the platforms. Use the slightly more twisted ones for the side trim.
I didn’t even stain this one. I just applied a clear matte varnish to protect the wood. The natural gray tones and the occasional nail hole give it so much character. It looks like it cost a fortune, but I only spent money on the screws and the varnish.
Final Thoughts on Your Bunk Build
Building a dog bunk bed is one of those projects that feels really rewarding. It’s not just a piece of furniture; it’s a statement of how much you love your fur babies. And the best part? You know it’s built solid, so it’s going to last for years.
Take your time with the measurements, and don’t be afraid to mess up. Wood is forgiving. You can always fill a gap with wood filler or trim a piece down. The most important thing is to have fun and enjoy watching your dogs discover their new favorite spot.
FAQ: Common Questions About DIY Dog Bunk Beds
Q: What is the best wood to use for a dog bunk bed?
A: I recommend Baltic birch plywood for the platforms because it’s strong and smooth. For the frames, standard pine 2x4s are great—they’re cheap and sturdy. Avoid particleboard or MDF because they can’t handle the weight and moisture.
Q: How much does it cost to build one?
A: If you use new lumber, expect to spend anywhere from $60 to $150 depending on the size and the finish you choose. If you go the pallet route, you could build one for under $30.
Q: How do I keep my dog from falling off the top bunk?
A: I add a raised lip or a low rail around the top platform. It doesn’t need to be high—just a few inches is enough to give them a physical boundary. Also, make sure the bed is large enough for them to turn around without getting too close to the edge.
Q: What is the safest way to finish the wood?
A: Use a water-based, non-toxic polyurethane or a natural oil like linseed oil. Avoid anything with harsh VOCs. Let it cure for at least 72 hours before letting your dog on it so the smell completely dissipates.
Q: How do I clean a wooden dog bed?
A: I always design mine with a removable cushion or a washable pad. For the wood itself, just wipe it down with a damp cloth and a mild soap solution. Once a month, I vacuum the corners to get rid of the embedded fur.