7 Painting Dog Easy Methods for Beginners That Actually Look Good
Painting your dog sounds intimidating, right? The thought of capturing those floppy ears or that soulful gaze feels like something only professional artists do. But here’s the thing—you don’t need to be Picasso to make a piece of art you’ll love. In fact, some of the cutest pet portraits come from simple, playful techniques that hide all the hard parts.
I’ve rounded up seven super forgiving methods that work with your skill level, not against it. Whether you’re painting from a photo or trying to get your wiggly pup to sit still (good luck with that), these ideas are all about having fun with paint, not stressing over perfection.
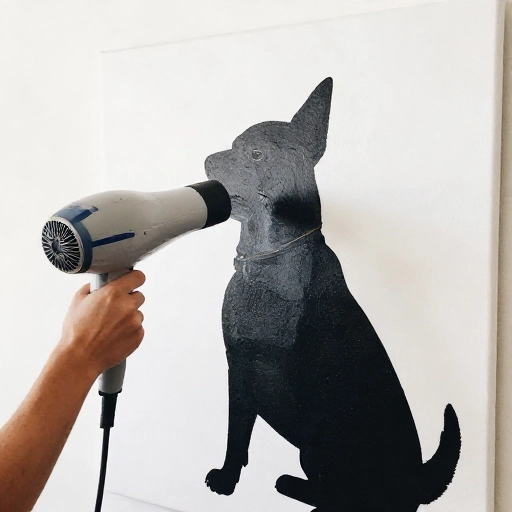
1. The Blow-Dry Splatter Technique
This one feels like magic. You literally blow paint around the canvas with a straw or a hairdryer on the cool setting. It creates this amazing, abstract fur texture that looks intentional and artsy, even though it’s mostly just chaos.
Start by adding a few drops of watery acrylic paint where your dog’s body should be. Then, blow the paint outward from the center. You’ll get these organic, spiky lines that mimic fur perfectly.
Once the paint dries, just paint a simple silhouette of your dog’s head over the top, or leave it abstract. It’s messy, it’s fun, and it looks like you spent hours on it.
Pro tip: Use a paper plate to practice the blowing motion before you hit the canvas. You want splatters, not puddles.
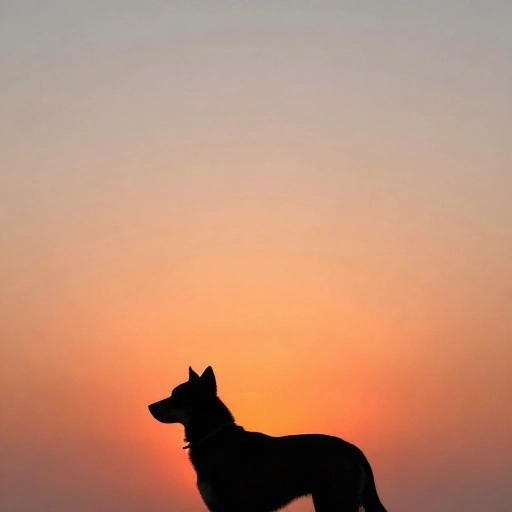
2. The Silhouette Sunset
If you want a guaranteed win, this is it. You paint a beautiful, colorful sunset background (think orange, pink, purple) and then paint your dog as a solid black silhouette in the foreground. It’s dramatic, emotional, and impossible to mess up.
You don’t need to paint eyes, noses, or fur. Just mix a deep black and fill in the shape of your dog from a side profile photo. The contrast does all the heavy lifting.
This works especially well for dogs with distinct head shapes, like German Shepherds or Greyhounds. The black paint is forgiving, so if you mess up the ear shape, just paint over it until it looks right.
Even if you’re not confident in your drawing skills, trace your dog’s photo onto the canvas with chalk first. It’s a secret artists use all the time.
3. The One-Brush Wash
Forget tiny brushes and detail work. This method uses a big, flat brush and lots of water. You’re going for a loose, watercolor-style look—even if you’re using acrylic paint. It’s all about soft edges and gentle washes of color.
Dilute your paint with water until it’s like thick juice. Then, lay down broad strokes for the base colors. Don’t try to paint individual hairs. Just suggest the shape of your dog’s head and body.
The magic happens when you let the layers dry and add a second, slightly darker wash for shadows. It gives the painting depth without needing any fancy techniques.
This is my favorite method for dogs with fluff because the blurry edges naturally suggest softness.
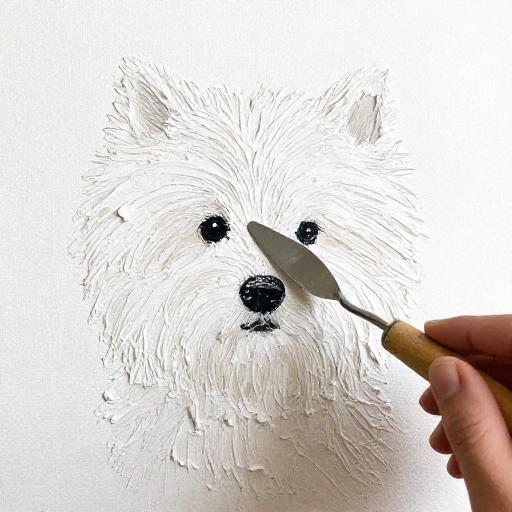
4. The Palette Knife Floof
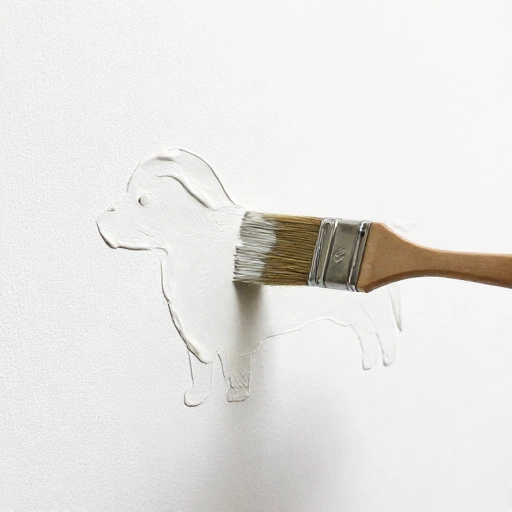
If you love texture, grab a palette knife (or even a plastic butter knife in a pinch). Instead of painting fur, you’ll be sculpting it with thick blobs of paint. This is perfect for long-haired pups like Golden Retrievers or Collies.
Load the knife with a thick glob of paint and scrape it across the canvas. The paint will catch and create little peaks that look just like fur tufts. It’s so satisfying to watch.
Work in layers. Start with the dark base colors, then add lighter highlights on top. The more paint you use, the more dimensional it looks.
Don’t stress about the details like the eyes or nose. Just make those areas with a slightly thinner layer of paint, and they’ll still pop against the textured fur.
5. The Color-Block Portrait
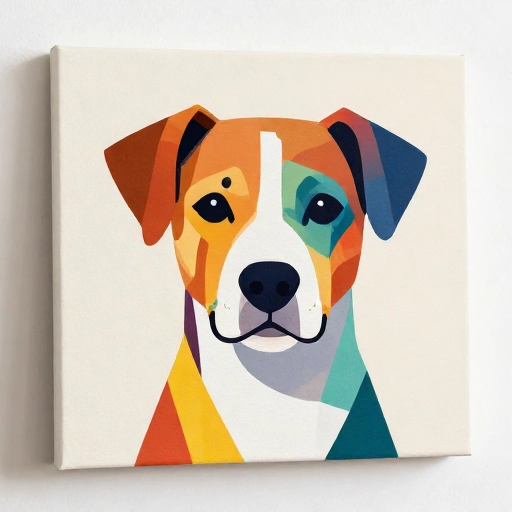
This is for the modern art lover. You break your dog’s face down into simple geometric shapes—triangles, squares, and rectangles. Each shape gets its own flat color. It’s like a puzzle that turns into a portrait.
Start by looking at a photo of your dog and squinting your eyes. This helps you see the big areas of light and dark, not the tiny details. Then, map those areas onto your canvas with a pencil.
Fill in each shape with a solid color. You can use realistic colors (browns, blacks, tans) or go wild with blues and pinks. Both look amazing.
The key is to keep the paint flat. Don’t blend the edges. The sharp lines are what make this style look cool and contemporary.
6. The Paw Print Keepsake
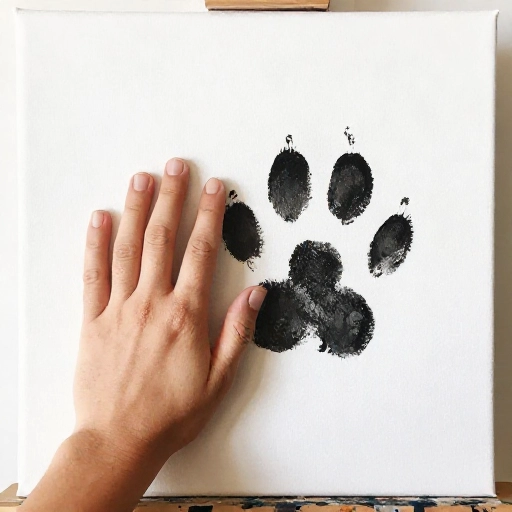
Okay, this one is less about a portrait and more about a memory. It’s the easiest thing on this list, and it’s perfect for a quick afternoon project. It’s also a great option if you want to involve the kids.
Paint your dog’s actual paw (use non-toxic, washable paint) and press it onto a canvas. You can do one big central print or a trail of little prints across the bottom.
Once it dries, you can leave it as is, or add a simple painted heart above the print. Sometimes the simplest ideas are the most meaningful.
If your dog hates having their paws touched, you can make a fake paw print by tracing their paw on paper and cutting it out to use as a stencil instead. No doggy drama needed.
7. The Accent Pop
If you’re scared to paint the whole dog, just paint a piece of them. This is a minimalist approach where you paint a simple, solid color for the background and then paint only one striking feature—like a single droopy ear, a shiny nose, or a big eye.
This method is incredibly forgiving because there’s less to mess up. A single, well-painted eye can be more impactful than a full portrait. It draws the viewer in and makes them imagine the rest.
Use a small round brush and take your time. Even if the eye isn’t perfect, it will look intentional because it’s the only focal point on the canvas.
Try adding a tiny reflection dot to the eye (a little white dot). That one little detail makes it look alive and professional.
Conclusion
There you have it—seven ways to paint your dog that don’t require a fine arts degree. The best part is that you can mix and match these techniques. Maybe you use the sunset background with the splatter fur texture for a unique twist.
Remember, the goal isn’t to create a perfect photographic replica. It’s to capture the feeling of your dog—their goofiness, their fluff, their loving eyes. Every painting you make will be one of a kind, just like your pup. So grab a canvas, pour some paint, and just go for it. You might surprise yourself.
Frequently Asked Questions
Q1: What kind of paint is best for beginners painting dogs?
Acrylic paint is your best friend. It dries fast, it’s easy to fix mistakes by painting over them, and it cleans up with just soap and water. Plus, it works on almost any surface.
Q2: How do I paint my dog’s fur if it’s black?
Don’t paint pure black. Mix in a little dark blue or brown to give it depth. Then, add a few strokes of gray or white on top to suggest the fur texture. This stops the painting from looking like a flat black blob.
Q3: Do I need to be good at drawing to paint my dog?
No, absolutely not. Methods like the silhouette or color-block style don’t require perfect drawing skills. You can also use tracing paper or a projector to transfer a photo of your dog onto the canvas. That’s not cheating; that’s being smart.
Q4: Can I use a photo instead of painting my dog live?
Yes, and I actually recommend it. A photo lets you capture all the details without your dog moving. It’s much easier to paint from a photo, especially for beginners. Just make sure the photo is clear and well-lit.
Q5: How long does it take to paint a dog for a beginner?
It depends on the method. A paw print or accent pop project could take under an hour. The silhouette sunset might take a couple of hours including drying time. Just take your time and enjoy the process. There’s no rush.