13 Elevated Dog Bowl DIY Designs That Look Amazing (Even on a Budget)
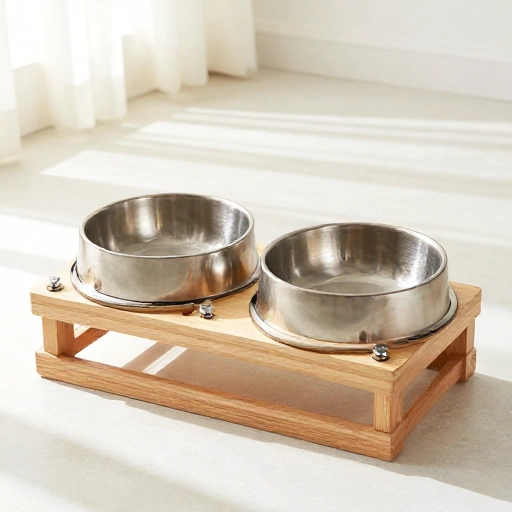
If your pup’s bowls keep sliding across the floor or you just want a feeding station that actually matches your home, an elevated dog bowl might be the upgrade you need. Raised feeders can reduce neck strain for older or larger dogs, and they honestly just look so much tidier in a corner.
I’ve rounded up 13 DIY elevated dog bowl designs that range from modern and minimalist to farmhouse cute. Most use basic tools, scrap wood, or even thrift store finds, so you can build one this weekend without spending a fortune.
Save this post to your pet DIY board now, because these are the kind of builds you will want to come back to.
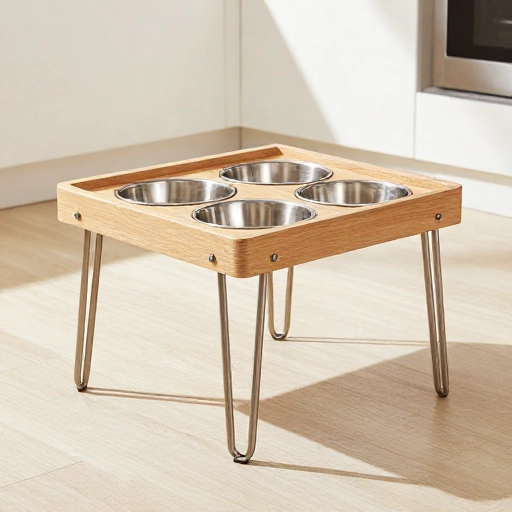
1. Modern Oak Raised Feeder with Hairpin Legs
This is one of my favorites because it looks like something from a high-end pet boutique, but it is basically a small cutting board plus four hairpin legs. You just need an oak or acacia board, two stainless steel bowls, and four screw-on hairpin legs in the height you want.
Start by tracing your bowl openings onto the wood, then cut them with a jigsaw or hole saw. Sand the edges super smooth so there are no rough spots for your dog to bump into. Attach the legs with short screws, then seal the wood with a food-safe finish like beeswax or mineral oil.
Make sure the legs are angled outward slightly at the bottom if you can. That extra stability really helps when bigger dogs push into the bowl while eating.
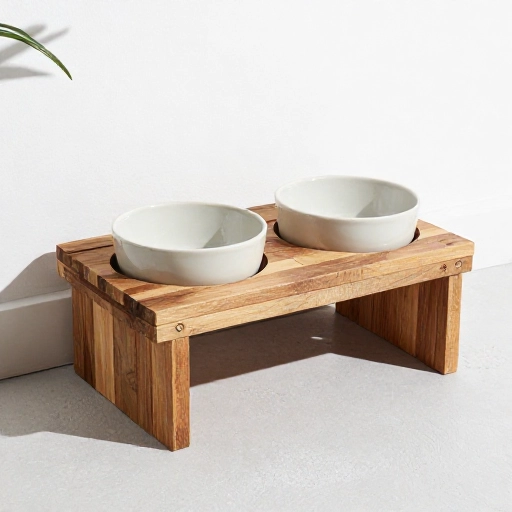
2. Scrap Wood Slat Platform Stand
This one is perfect if you have leftover fence boards or decking pieces lying around. The slatted design gives it a breezy outdoor feel, and it works just as well next to a patio door as it does in a kitchen.
Build a simple rectangular frame from 2x2s, then screw several slats across the top with small gaps between them. Cut two bowl holes in the middle slats before assembly, or use a jigsaw to cut them after the top is complete. The gaps allow spilled water to drain through instead of pooling on the wood.
I love this version with a light whitewash stain, but raw wood with a clear outdoor sealant looks great too.
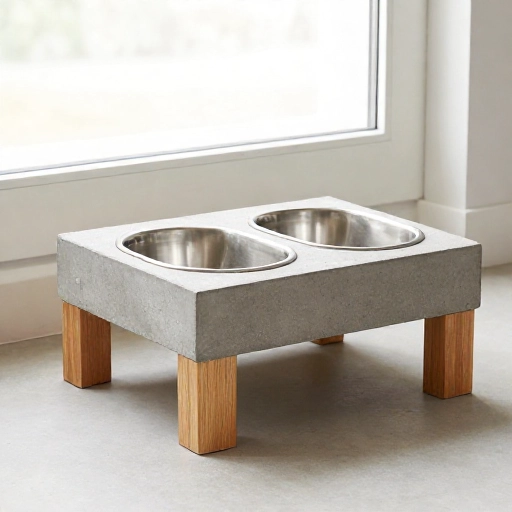
3. Concrete and Wood Minimalist Bowl Station
If you love that modern industrial look, this is the design for you. The base is made from a small concrete pour, and the top is a slab of walnut or oak. It sounds complicated, but you can use a quick-setting concrete mix and a simple plastic container as the mold.
Once the concrete cures, attach the wood top with construction adhesive or small brackets. Then drill your bowl holes. The contrast between the cool gray concrete and warm wood is stunning, and it is heavy enough that your dog will not scoot it across the floor.
You can add little rubber feet underneath to protect your floors and keep it from scratching.
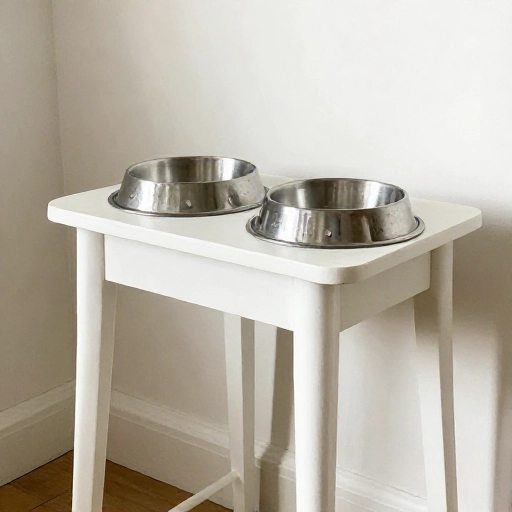
4. Repurposed Side Table Dog Diner
This is the easiest one on the list, and it is perfect for thrift store lovers. Look for a small side table or nightstand with a top that is wide enough for your dog’s bowls. It does not matter if the finish is dated because you can paint or sand it.
Remove the top if it is easy, or just cut bowl holes directly into it. Trace your bowls, cut with a jigsaw, and sand the openings. If the table is a little too tall, you can shorten the legs with a saw. If it is too short, add furniture risers or replace the legs.
I found a $12 nightstand at a thrift store and turned it into a cute navy blue feeder with gold bowl rims. It looked like I spent way more.
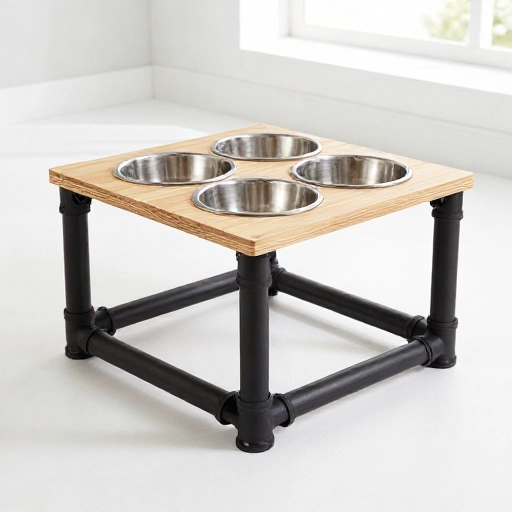
5. PVC Pipe Industrial Elevated Pet Feeder
Yes, PVC can be chic. This design uses thick PVC pipes as legs and a painted wood top as the feeding surface. The trick is to use spray paint that bonds to plastic and to sand the pipe lightly before painting so the paint sticks.
Cut four equal lengths of wide PVC pipe for the legs. Attach floor flanges to the bottom of the wood top so you can screw the pipes right into them. Matt black or matt brass spray paint makes this look surprisingly expensive.
Add a matching pipe handle on one side if you want a little extra industrial character. It is also really easy to wipe down.
6. Galvanized Bucket Holder Farmhouse Style
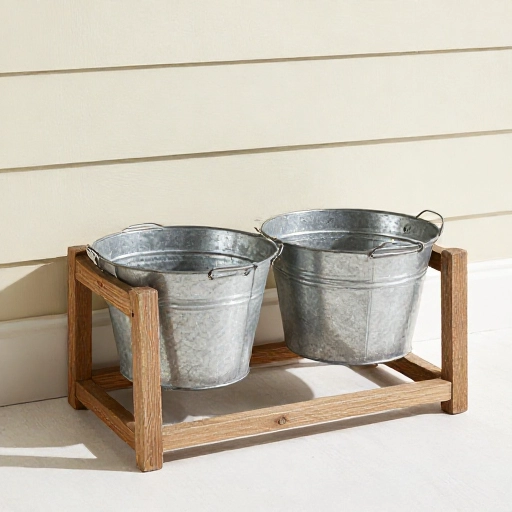
This one is more of a bowl holder than a full stand, but it is adorable. You take a low wooden box or crate platform, cut two holes in the top, and drop in small galvanized buckets. The buckets act as the bowls and the rustic charm comes built in.
Make sure the buckets you choose are food-safe if your dog will eat directly from them. If not, you can line them with a removable stainless steel bowl. The bucket lip should sit above the wood so you can lift them out to clean.
A little bit of white paint, some sanding on the edges for a distressed look, and this becomes a farmhouse showpiece.
7. Floating Wall-Mounted Slow Feed Station
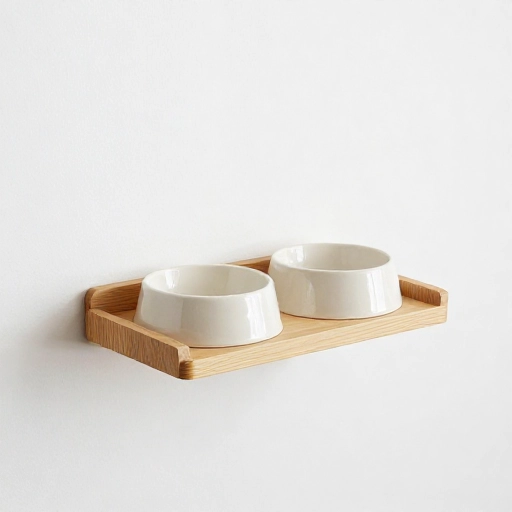
If you are short on floor space, a wall-mounted feeder is a game changer. This design uses a simple wood shelf bracket system and two removable bowls that sit in a cutout platform mounted to the wall.
Install the bracket at the correct height for your dog, usually around the height of their lower chest or elbow. Make sure it is anchored into studs because dogs can push down pretty hard while eating. The platform should be deep enough for the bowls and have a small lip or recessed holes to keep them from sliding.
I love this for small apartments or for dogs who get overexcited and knock a floor stand around.
8. Drawer Front Upcycled Tilted Bowl Stand
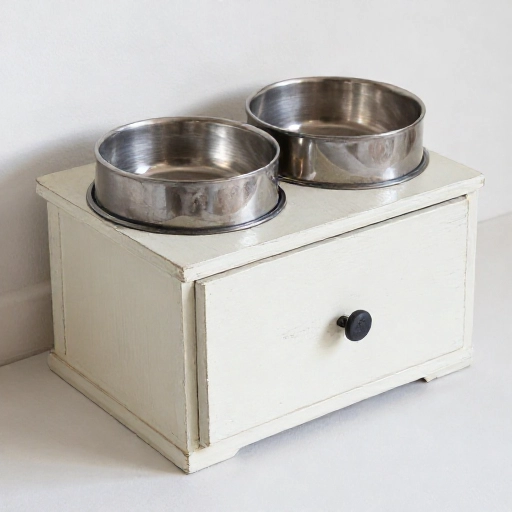
Old drawer fronts are the perfect size for a small raised feeder. You can usually find them at architectural salvage stores or even in a pile of discarded furniture. The decorative edges give you instant charm without any extra work.
Build a simple angled base from two side pieces shaped like a triangle or wedge. Attach the drawer front to the front face, and cut bowl holes into a separate top panel. The tilted angle can help smaller dogs or flat-faced breeds reach their food more easily.
Paint the base a contrasting color to the drawer front, or keep it all one tone for a more seamless look.
9. Copper Pipe and Marble Tile Luxury Feeder
This one looks like a designer piece, but it is mostly about the materials. Use a piece of marble or granite tile as the top, and build the frame from copper pipe and fittings. The copper gives it warmth, and the stone top is heavy, cool, and easy to clean.
For the top, a marble-pattern laminate sheet over plywood gives you the same luxe look without diamond hole saws. If you do want real stone, use a porcelain tile and a diamond hole saw, and work slowly with water.
Build the base from copper pipe cut into four equal legs, attached to the wood top with copper pipe straps. A matching lower shelf made from the same plywood adds extra storage and keeps the legs from wobbling.
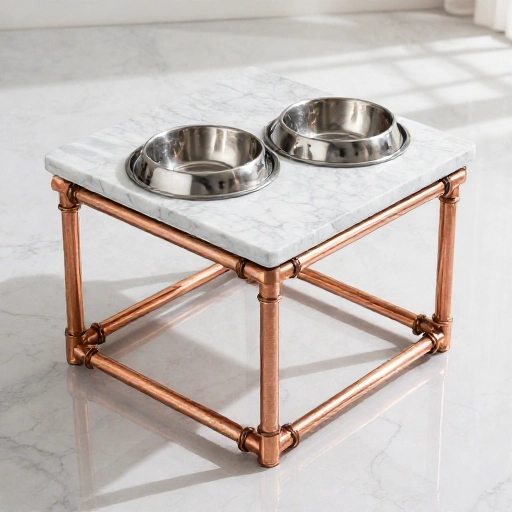
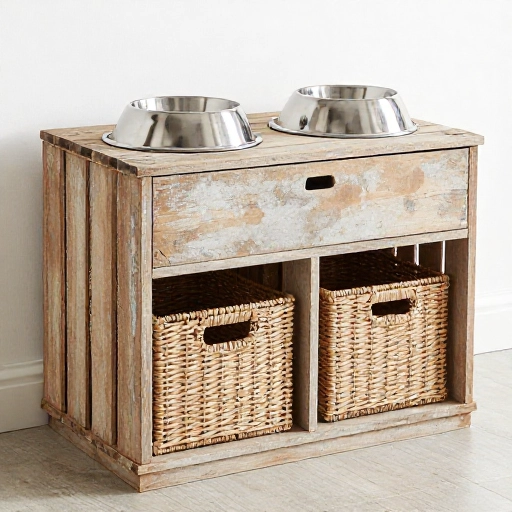
10. Crate-Style Rustic Double Diner with Storage
This design combines a raised feeder with a storage cubby underneath, which is perfect for keeping food bags, treats, or toys hidden but accessible. You basically build a low wooden crate with an open front or side.
The top is a hinged or removable panel with two bowl holes. The inside can hold a small storage basket or a bin of kibble. Use pine boards and a dark walnut stain for that classic rustic look.
Make sure the storage area is dog-proof if your pup is a food thief. A simple sliding door or a latch on the side can keep curious noses out.
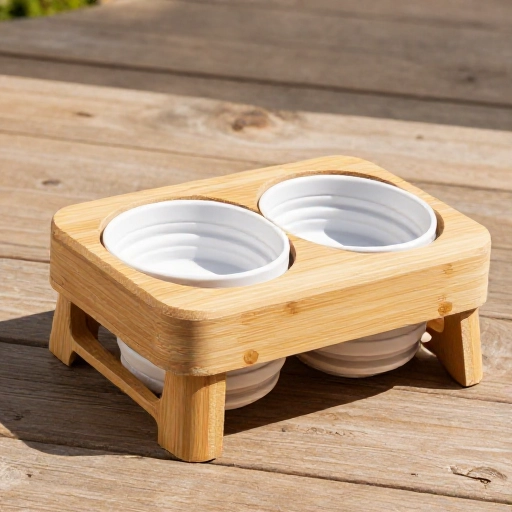
11. Foldable Bamboo Travel Elevated Bowl
A collapsible elevated stand is something you don’t see in stores very often, but it is so useful for travel, camping, or visiting family. This design uses bamboo cutting boards and a simple X-frame hinge system.
Cut two identical bamboo panels for the top and bottom. Connect them with crossing wooden slats on each side that fold flat when not in use. Drill bowl holes into the top panel, and add small metal pins or wing nuts so you can lock the stand open.
Bamboo is naturally water-resistant, but I would still give it a light coat of food-safe oil and wipe it down after every trip.
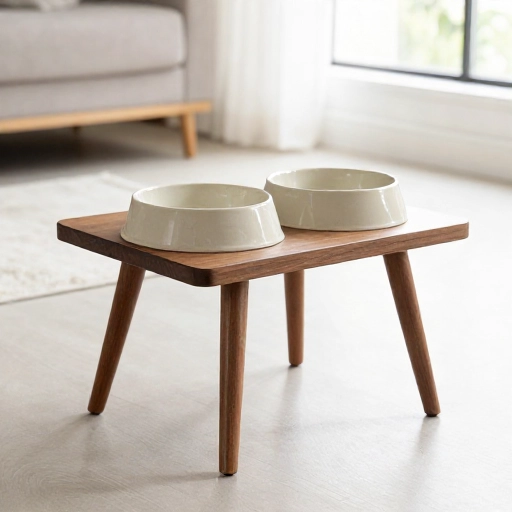
12. Mid-Century Tapered Leg Raised Bowls
If you love that atomic-era shape, this is the one. You build a simple rounded or rectangular top and attach four tapered legs that angle slightly outward. The legs are what make it look mid-century rather than standard homemade.
You can buy pre-tapered wooden legs at most hardware stores, or cut your own from 2x2s with a table saw or jigsaw. Stain the top a warm walnut and the legs a darker espresso, or paint the legs black and leave the top natural wood.
Pair it with white or pastel bowls and this feeder will look like a little piece of furniture, not just a pet accessory.
13. Adjustable Height Wooden Dowel Stand
This one is brilliant if you have a puppy who is still growing or multiple dogs of different sizes. The top platform sits on four wooden dowels that slide into a base with pre-drilled holes at different heights.
Drill matching holes in the base corners and the underside of the top. Use thick hardwood dowels for strength. You can raise or lower the top by moving the dowels to deeper or shallower holes, or by using different lengths of dowel.
To keep it stable at the highest setting, add small locking pins through the side of the base into the dowels. Sand the dowels smooth so they don’t splinter when you adjust them.
Conclusion
An elevated dog bowl does not have to be an expensive designer purchase. With a little creativity, you can build something that fits your home, your dog’s size, and your skill level. Whether you want a quick thrift flip or a full weekend woodworking project, one of these 13 designs should feel doable.
I’d love to know which one you are planning to build first. Save this post for later, and do not forget to measure your dog’s elbow height before you start cutting.
Elevated Dog Bowl DIY FAQ
What height should an elevated dog bowl be?
Generally, the top of the bowl should sit at or just below your dog’s lower chest or elbow height. For most medium dogs, that is between 8 and 14 inches. Measure your dog from the floor to the top of their front leg where it meets the chest, then subtract about 2 to 4 inches so they don’t have to reach up or bend down too far.
What materials are safe for DIY elevated dog bowls?
Food-safe wood finishes like beeswax, mineral oil, or a water-based food-safe polyurethane are good choices. Avoid soft woods that splinter easily unless you sand them very well. Stainless steel, food-safe ceramic, and food-grade plastic bowls are safe. If you use galvanized buckets, make sure they are food-safe or use a removable stainless steel liner inside.
Can I make an elevated dog bowl without power tools?
Yes. You can use a sturdy pre-made wooden crate, a thrifted side table, or even a large bamboo cutting board. For bowl holes, some stores can cut wood for you, or you can choose a design where bowls sit in a recessed tray rather than flush holes. Adhesive felt pads, pre-cut furniture legs, and strong construction glue can replace many screws.
How do I clean a wooden elevated dog feeder?
Wipe it down daily with a damp cloth and mild soap, then dry it thoroughly. Avoid soaking the wood. Every few weeks, reapply a thin layer of food-safe oil or wax to protect the surface. If water or food gets trapped around the bowl openings, remove the bowls and dry that area right away to prevent warping or mold.
Are elevated dog bowls good for all dogs?
Not always. Many dogs eat comfortably from floor-level bowls without issues. Elevated feeders can help older dogs, large breeds, or dogs with certain neck or joint problems, but some studies suggest rapid eating from raised bowls may slightly increase bloat risk in a few large, deep-chested breeds. If you are unsure, ask your vet before switching your dog to a raised feeder.