7 Genius Cat Litter Cabinet Plans Anyone Can Build
Let’s be real—nobody loves staring at a litter box. It’s an eyesore, it tracks dust everywhere, and that smell? Yeah, we’re fixing all of that today. If you’ve been scrolling Pinterest for hours looking for the perfect hideaway, stop right there. I’ve rounded up seven cat litter cabinet plans that are actually doable, even if you’re not a seasoned woodworker.
These aren’t just boxes to hide the mess. They’re functional furniture pieces that give your cat some privacy, keep the litter contained, and make your space look way more put-together. Plus, most of these can be built in a weekend with basic tools. Grab your measuring tape and let’s get started on making something your cat (and your guests) will love.
1. The Classic Barn Door Hideaway
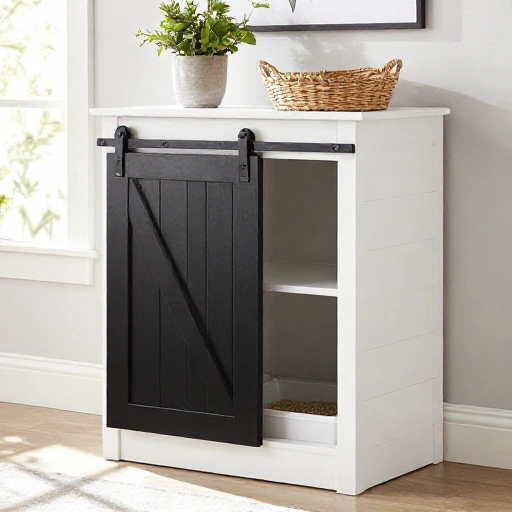
This is the plan I see pinned the most, and for good reason. It’s a simple wooden cabinet with a sliding barn door that you can push open with your foot. The beauty? No swinging door to block your path in a hallway or tight corner. You just slide it open, scoop, and slide it shut.
You’ll need a sheet of plywood, a barn door track kit, and some basic hinges for the top. The inside is roomy enough for a standard litter pan, and you can add a small hook on the inside wall to hang your scoop. I’d recommend adding a little weather stripping along the bottom edge to keep any stray litter from escaping.
This plan is perfect for beginners because it’s mostly straight cuts and simple assembly. You can paint it any color to match your trim, or stain it for a warmer farmhouse vibe. It’s the workhorse of cat furniture.
2. The Mid-Century Modern Sideboard
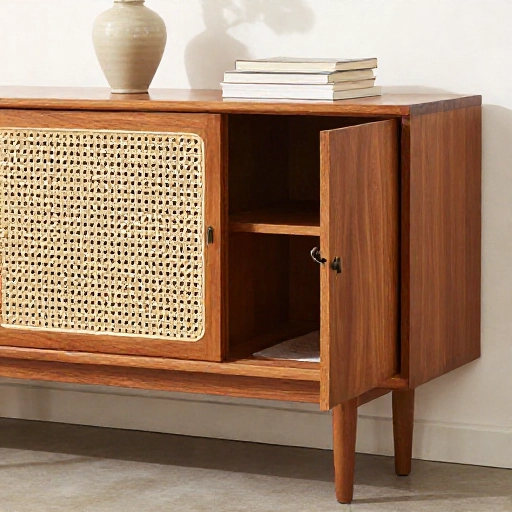
If your living room is your cat’s main hangout, you need something that looks intentional. This plan transforms a plain sideboard into a sleek cat bathroom. The key is using hairpin legs for that retro feel and a piece of fabric or a cat door flap on the front panel.
Start with a simple rectangular frame. Cut a large circular hole in one side panel and install a plastic cat door. The top of the sideboard stays completely flat, so you can style it with a plant, a stack of books, or a cute basket. It’s furniture first, litter box second.
One tip from my own build: use a darker wood stain or a matte black paint. It hides dust and paw prints way better than white. And make sure the interior is large enough for your cat to turn around comfortably—nobody likes a cramped bathroom.
3. The Corner Nook Saver
Got an awkward empty corner in the laundry room or bedroom? This plan is your best friend. It’s a triangular or L-shaped cabinet that fits snugly into a corner, using space that would otherwise be completely wasted. It’s genius for small apartments.
The build is a bit more advanced because of the angled cuts, but you can simplify it by using a large corner shelf unit and modifying the base. You’ll have two entry points—one in the front and one on the side—so your cat can escape quickly if they feel cornered (pun intended).
I added a small curtain on the front opening instead of a door. It’s super cheap, easy to replace when it gets smelly, and it gives your cat a little peek-through privacy. Just use a tension rod and some fun fabric.
4. The Upcycled Dresser Hack
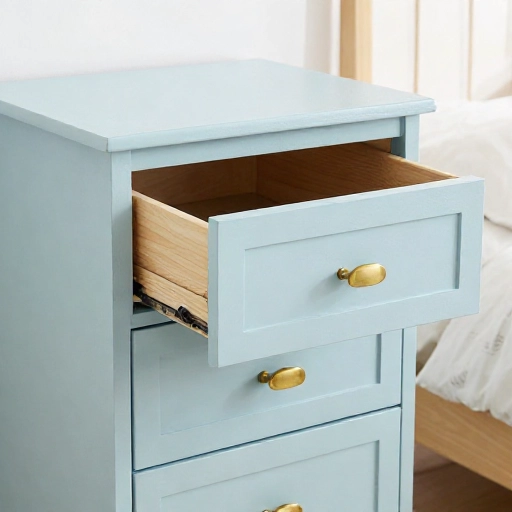
This is the budget-friendly queen of all plans. Instead of building from scratch, you’re going to find an old dresser at a thrift store or on a curb. It’s the ultimate “don’t toss it, upcycle it” project. You’ll be amazed at what a fresh coat of paint can do.
Remove the bottom two drawers. Cut a hole in the back panel for the litter box to slide into, and cut another hole in the side or front for your cat’s entrance. The top drawers can stay for storage—think cat toys, extra litter bags, and treat jars.
This plan is all about personality. I found a beat-up oak dresser and painted it sage green with gold handles. It looks like a designer piece, but it cost me twenty bucks and a Saturday. Make sure to sand down any rough edges so your cat doesn’t get snagged.
5. The Minimalist Crate & Curtain Box
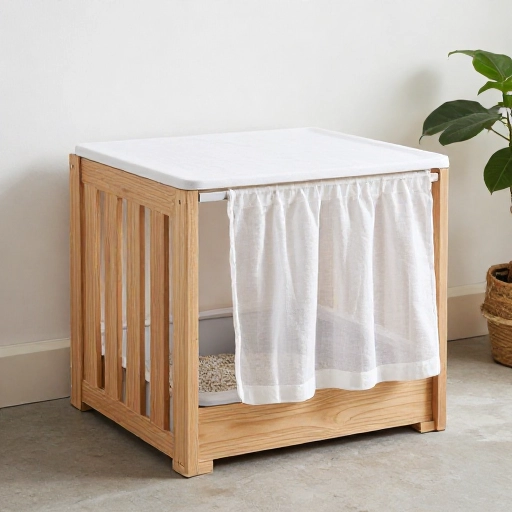
If you want something that takes less than an hour and costs under thirty dollars, this is it. It’s not even a cabinet in the traditional sense—it’s a wooden crate flipped on its side with a curtain. But it works, and it looks incredibly chic in that “industrial loft” kind of way.
Find a large wooden crate (wine crates or shipping crates work well). Sand it down, stain it or leave it raw, and attach a small curtain rod to the opening. Place the litter box inside. That’s literally it. You can stack a second crate on top for plant storage or more cat supplies.
The open-air design actually helps with ventilation, which means less lingering odor. I lined the bottom with a cheap plastic tray to catch any overflow, and I swap out the curtain every few months for a fresh look. It’s perfect for renters because it’s totally portable.
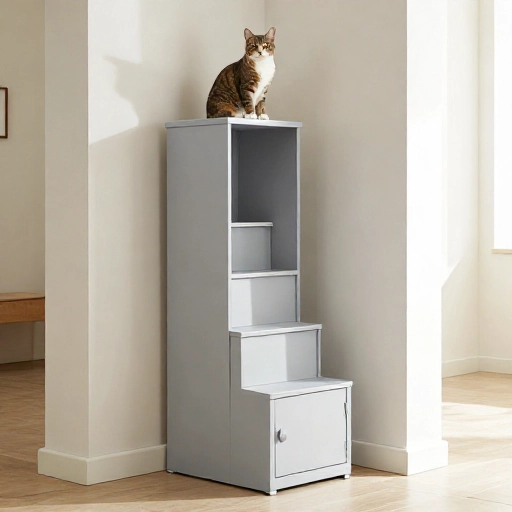
6. The Tall Tower with Built-In Steps
This one is for the cats that love to climb. It’s a tall, narrow cabinet that hides the litter box at the base and features a few shelves on top for your cat to lounge on. It’s like a cat tree and a litter box had a baby, and it’s brilliant.
The base is fully enclosed with a cat flap. Above that, you build a few open shelves that are staggered so your cat can jump up and down. The top shelf is a comfy perch with a little cushion. You’re giving your cat a vertical playground while keeping the messy stuff hidden below.
This plan requires more plywood and a bit more patience, but the payoff is huge. It’s a statement piece that actually reduces furniture scratching because your cat has a designated high spot. Just make sure the base is wider than the top so it doesn’t tip over.
7. The Dual-Purpose Entryway Bench
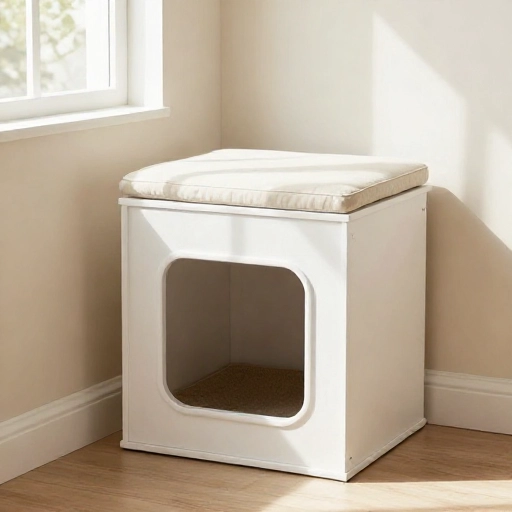
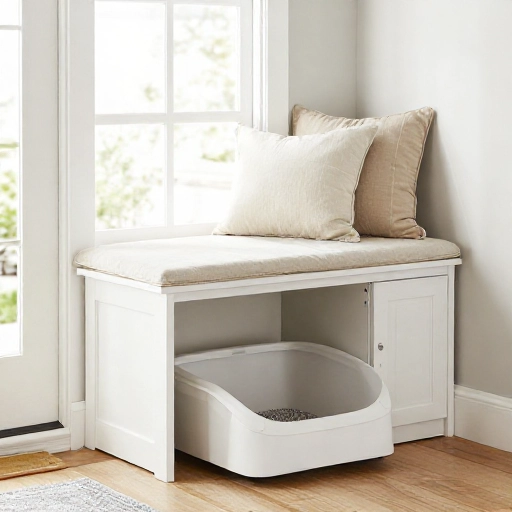
Last but not least, this is the ultimate space-saver for small entryways or mudrooms. It’s a bench where you can sit to put on your shoes, and underneath the seat is a hidden compartment for the litter box. It’s the perfect “furniture that does double duty” plan.
Build a sturdy box frame with a hinged lid. Cut a cat-sized hole in the side or the back. Add a cushion on top of the lid for comfortable seating. When you need to scoop, just lift the cushion and the lid, and everything is right there.
I added a small handle on the front side door for easy access. The best part is that this cabinet doesn’t look like a cat thing at all. It just looks like a smart storage bench. You can even keep your keys and mail in a small basket on top of the cushion.
Wrap-Up: Pick Your Build & Get Crafting
There you have it—seven totally different ways to hide the litter box. Whether you’re a seasoned carpenter or a first-time DIYer, there’s a plan here that fits your skill level and your space. The most important thing is to measure your cat’s litter box first, and always leave enough room for your cat to move around inside.
Building your own cat furniture is so rewarding. You get to customize the size, the color, and the style to match your home perfectly. Plus, your cat will probably think it’s a fun new fort. Grab your tools, pick a plan, and let’s make that litter box disappear for good.
Frequently Asked Questions
1. What is the best material to use for a cat litter cabinet?
Plywood is the best all-around choice. It’s sturdy, affordable, and easy to paint. If you’re building something lightweight, you can use MDF, but plywood handles moisture and scratches better in the long run.
2. How do I keep my cat litter cabinet from smelling?
Ventilation is key. Add a small vent hole in the back or side of the cabinet, and consider using a charcoal filter pad. Also, scooping daily makes a huge difference—even a beautiful cabinet won’t fix a dirty box.
3. Should I put a cat door flap on the cabinet?
It depends on your cat. Some cats hate flaps, while others love the privacy. If your cat is shy, a flap is great. If they’re skittish, leave the front open or use a curtain so they can escape quickly.
4. How big should the cabinet be for my cat?
A good rule of thumb is that the cabinet should be at least 1.5 times the length of your cat. They need to stand up, turn around, and dig comfortably without feeling trapped. Measure your cat’s body length and add a few inches.
5. Can I build this with just a drill and a saw?
Absolutely. Most of these plans only require a circular saw (or even a hand saw), a drill, and a screwdriver. If you don’t have a saw, many hardware stores will cut your plywood to size for free when you buy it.