7 Tidy DIY Dog Feeding Station Ideas Your Pup Will Love (And You’ll Actually Want In Your Kitchen)
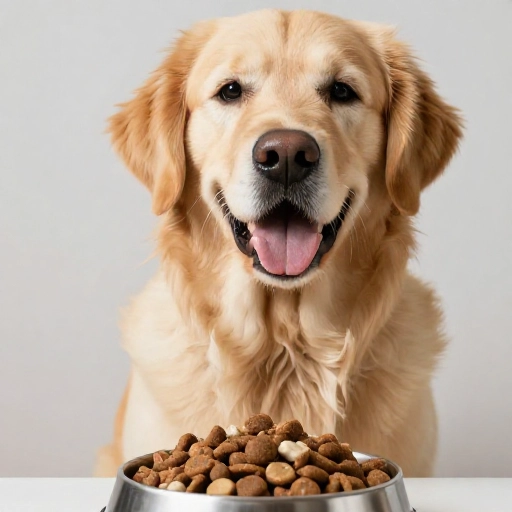
Let me be honest with you for a second. I used to just toss my dog’s bowls on the kitchen floor next to the fridge. Every single day, I’d watch water slosh out, kibble scatter like confetti, and my dog somehow manage to push the bowl three feet across the tile in under ten seconds. It drove me absolutely crazy. Between the constant mopping, the sliding bowls, and the messy look of it all, I knew something had to change.
That’s when I started looking into DIY dog feeding stations. And let me tell you, they are a game-changer. Not only do they keep everything in one tidy spot, but they also protect your floors, make mealtime more comfortable for your dog (especially for older pups or tall breeds), and honestly, they just look so much better than a random bowl on the floor. Whether you have a tiny apartment or a big farmhouse kitchen, these seven ideas are simple enough for a weekend project and cute enough that you’ll actually want to show them off. Let’s dive into my favorite designs, from super simple to a little more fancy.
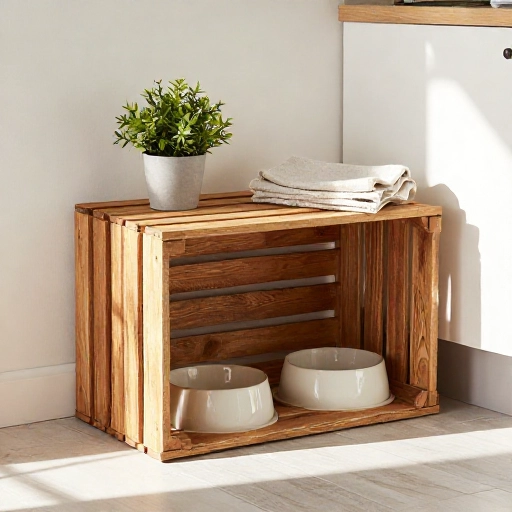
1. The Rustic Wooden Crate Feeding Station
This is the perfect starting point if you’re looking for something that feels warm and farmhouse-chic. I love using an old wooden crate or a simple pine box because it’s forgiving to work with, and you don’t need a lot of fancy tools. It adds instant character to a kitchen corner, and the raised sides help contain any messy splashes or dropped kibble. Plus, it naturally elevates the bowls to a more comfortable height for your dog, which is great for their digestion and neck strain.
What you’ll need:
- A sturdy wooden crate (or a pre-made wooden box)
- Sandpaper (medium grit)
- Wood stain or non-toxic paint
- Polyurethane sealant (food-safe)
- Two stainless steel bowls that fit inside the crate
How to put it together:
- Sand the entire crate smooth to avoid any splinters, then wipe off the dust.
- Apply your stain or paint, let it dry, and finish with a couple coats of food-safe sealant to protect against water damage.
- Place the bowls inside, and simply set it on the floor or on a mat. That’s it!
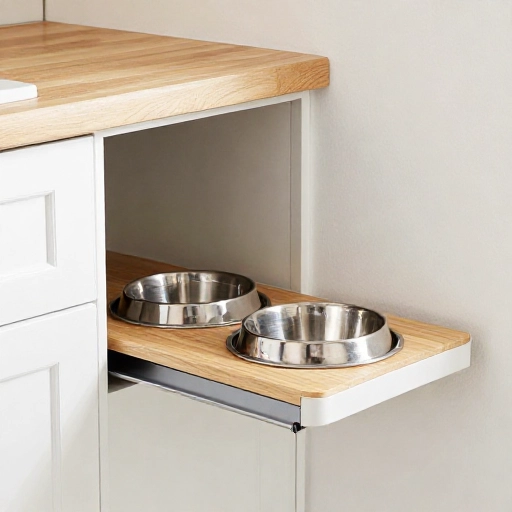
2. The Space-Saving Sliding Tray Station
If you have a narrow gap between your cabinets and your island, this idea is a lifesaver. I built a simple sliding tray that tucks neatly out of sight when not in use. It’s basically a piece of plywood on heavy-duty drawer slides. This keeps the floor completely clear when you’re cooking or when guests come over, but makes mealtime a breeze. It’s also fantastic if your dog is a messy eater and you want to be able to easily wipe down the tray itself.
What you’ll need:
- 1/2-inch plywood (cut to fit your gap)
- A pair of heavy-duty drawer slides
- Wood screws
- Non-slip rubber mat or cork liner
- Two bowls
How to put it together:
- Attach the drawer slides to the inside of your cabinet frame and to the plywood tray using a screwdriver.
- Cover the top of the plywood with your non-slip mat to keep the bowls steady.
- Slide it in and out to test the motion, then place your bowls on top.
3. The Repurposed Nightstand Feeding Nook
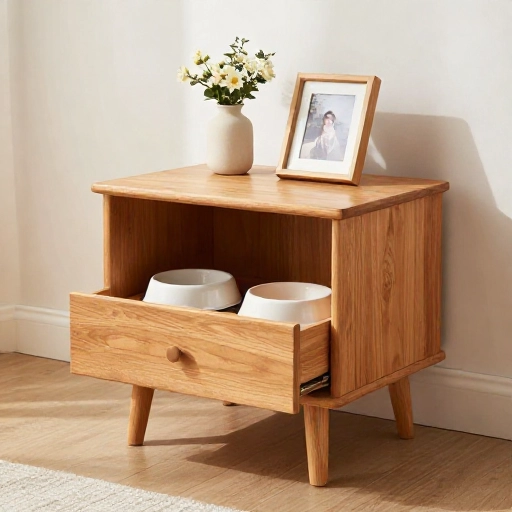
Don’t walk past that old thrift store nightstand without a second look. This is one of my favorite upcycling projects because it gives you tons of hidden storage. I found an old oak nightstand with a drawer, and I simply cut a hole in the top of the cabinet section for the bowls. The drawer below is perfect for storing dog food bags, treats, and all those little toys that seem to multiply. It looks like a piece of furniture, not a pet accessory, which is a huge win for keeping your home looking polished.
What you’ll need:
- An old nightstand or small side table with a cabinet
- A jigsaw
- Pencil and tape measure
- Stain or paint (optional, for a refresh)
- Two bowls
How to put it together:
- Trace the outline of your bowls on the tabletop, leaving about an inch of space between them.
- Use a jigsaw to carefully cut out the holes.
- Sand the edges, then drop your bowls into place. Store all your dog supplies in the drawer below.
4. The Modern Minimalist PVC Pipe Stand
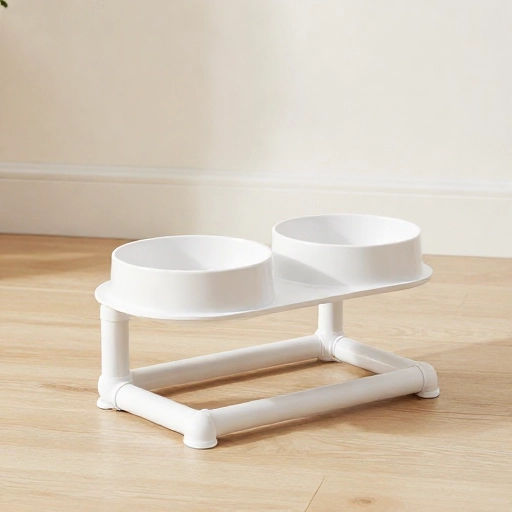
For those of you who love a clean, modern, and ultra-functional look, this PVC pipe stand is surprisingly classy. I know what you’re thinking—PVC pipe sounds like a plumbing project—but when you paint it a matte black or a chic sage green, it looks like a high-end boutique piece. The angle of the stand slightly tips the bowl, which is actually a really popular ergonomic design for dogs. It makes scooping the last bits of food easier and reduces bloat risk for some breeds.
What you’ll need:
- 4-inch diameter PVC pipe (cut into two equal lengths)
- A miter saw or hand saw
- Spray paint (matte finish)
- Rubber non-slip feet
- Two bowls that fit snugly into the pipe
How to put it together:
- Cut the PVC pipe to your desired height—usually 6-8 inches for medium dogs.
- Spray paint the outside of the pipes and let them dry completely.
- Attach rubber feet to the bottom, then push the bowls down into the top of the pipes.
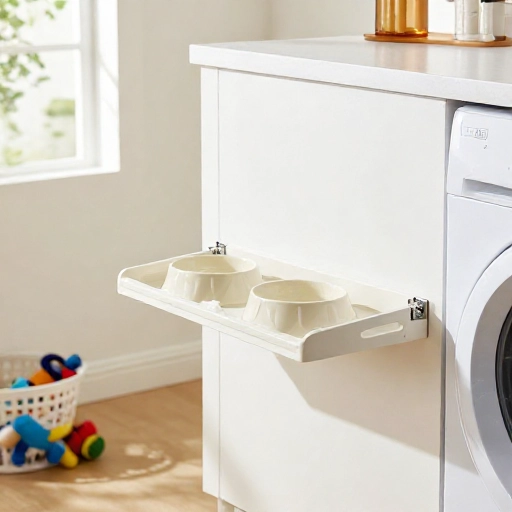
5. The Wall-Mounted Flip-Down Feeding Shelf
Okay, this one is for the tiny home dwellers and the dog parents who are tired of tripping over bowls in the mudroom. I mounted a fold-down shelf to the wall in my laundry room. When it’s down, it creates a sturdy ledge for the bowls. When it’s up, it’s completely out of the way. I used a heavy-duty hinge and a small chain to hold the weight. It’s incredibly simple to make, and it keeps your floors spotless because you can just hose down the area underneath.
What you’ll need:
- A 1×12 wood board (cut to your desired length)
- Heavy-duty folding shelf brackets (or hinges and a chain)
- Wall anchors and screws
- Wood finish
- Two shallow bowls
How to put it together:
- Cut and sand your wood board, then apply your finish.
- Attach the folding brackets to the wall at your dog’s shoulder height.
- Screw the board onto the brackets. Fold it up when not in use, and lower it for feeding time.
6. The Chic Tiled Breakfast Bar
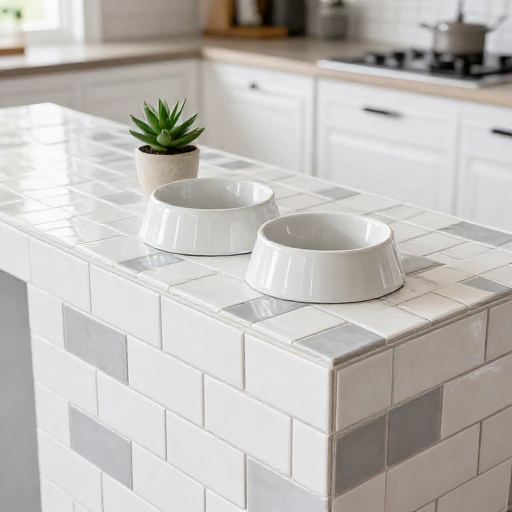
If you want a feeding station that’s both gorgeous and functional, this tiled version is my absolute favorite. I built a simple wooden frame and then applied a sheet of peel-and-stick tile to the top. It looks like a custom-built kitchen feature, and the tile makes cleaning up a total breeze. No more scrubbing dried drool off wood—just a quick wipe with a sponge and it’s sparkly clean. It also adds a pop of color and pattern to your space.
What you’ll need:
- Plywood base (cut to size)
- 2×2 wood blocks for legs
- Peel-and-stick tile sheets
- Wood glue and screws
- Two stoneware or ceramic bowls
How to put it together:
- Assemble your wooden frame and legs with wood glue and screws.
- Peel and stick the tile onto the top surface, pressing out any air bubbles.
- Let it sit for 24 hours, then place your bowls on the tiled surface.
7. The Built-In Hidden Feeding Drawer
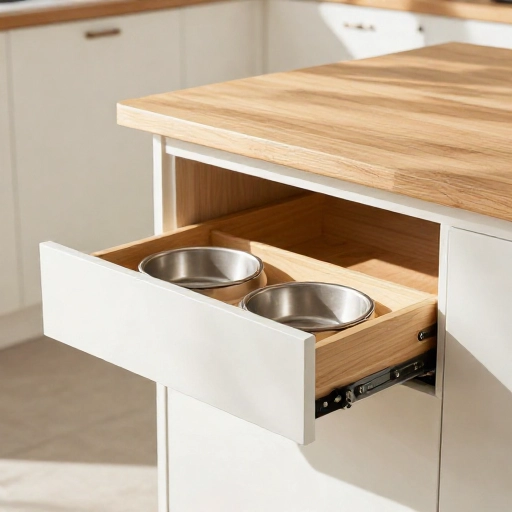
This is the ultimate “wow” factor project, and it’s easier than it sounds. I created a false drawer front on a standard kitchen cabinet base. The drawer actually pulls out to reveal the bowls sitting on a sliding base. It looks like just another cabinet in your kitchen, but pull the handle and breakfast appears. This is perfect for people who want a totally seamless look. I used a heavy-duty drawer slide that can handle the weight of the bowls and your dog’s head resting on the edge.
What you’ll need:
- A base cabinet or a sturdy wooden box frame
- A heavy-duty drawer slide (rated for 100 lbs)
- Plywood for the slide-out tray
- A cabinet door or drawer front to match your kitchen
- Bowls and a non-slip mat
How to put it together:
- Attach the drawer slide to the inside of the cabinet frame.
- Mount the plywood tray to the slide, and attach your cabinet door to the front of the tray.
- Place the non-slip mat and bowls on the tray. Pull the handle to slide it out for dinner.
Tips & Safe Baking Guidelines for Keeping It Tidy
Now that you’ve picked your favorite design, let’s talk about keeping things safe and clean. First, always choose stainless steel or ceramic bowls. They are the easiest to sanitize and don’t harbor bacteria like plastic can. For storage, if your station has a drawer or cabinet space, keep your dog’s food in an airtight container to keep it fresh and pests away. I always keep a washcloth or a small towel hanging nearby for quick cleanups after sloppy drinkers.
Make sure to use pet-safe finishes on any wood that your dog might lick. Look for non-toxic, water-based sealants and let them cure for the full recommended time (usually 72 hours) before letting your pup near it. Finally, measure the height of your dog’s shoulder—the bowl should be roughly level with their lower chest to promote good posture while eating.
Wrapping It Up
Building a tidy feeding station isn’t just about looks, it’s about creating a calm, dedicated space for your furry friend. Whether you go for the ten-minute PVC pipe build or the weekend-worthy tiled bar, your dog will appreciate having a stable spot to eat without chasing their bowl around. And honestly, you’ll appreciate the lack of mess on your floor. Pick the one that fits your space and your skill level, and enjoy a cleaner home and a happier pup.
Frequently Asked Questions
How high should a dog feeding station be?
You want the top of the bowl to be roughly level with your dog’s lower chest, right where their sternum meets their front legs. For most medium dogs, this is around 8 to 10 inches, but measure your own dog to be sure. A taller station is better for large breeds like Great Danes, while a low station is perfect for Dachshunds.
Is it better to have raised dog bowls?
Raised bowls are generally good for most dogs because they reduce neck strain and keep food in a more natural position. However, for dogs prone to bloat (like deep-chested breeds), you should consult your vet. For senior dogs with arthritis, raised bowls are a lifesaver because they don’t have to bend down as far.
How do I keep my dog’s water bowl from getting slimy?
Wash the bowl daily with hot, soapy water. I also recommend using a stainless steel bowl over plastic, as it’s less porous and easier to scrub clean. If you have a water fountain, cleaning it weekly with a vinegar solution helps remove that slippery film.
Can I use an old dresser drawer for a feeding station?
Absolutely! Just make sure the drawer is deep enough to support the bowls. You can place the bowls directly in the drawer, or cut holes in the bottom to recess them. Just ensure the wood is sealed properly to prevent water damage, and sand any rough edges.
What is the best material for a DIY feeding station?
I prefer pine or plywood for the frame because they are cheap and easy to cut. For the surface where the bowls sit, anything non-porous is best—like tile, sealed hardwood, or even a sheet of acrylic. Avoid raw MDF, as it swells and falls apart when it gets wet.