13 Genius Pallet Dog Bed Transformations That Will Upgrade Your Pup’s Nap Game
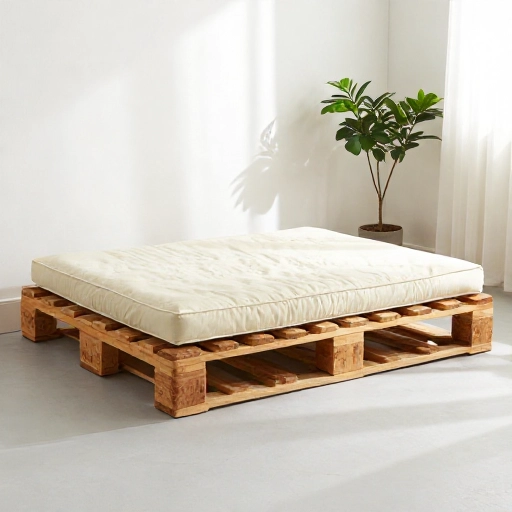
Let’s be honest—our dogs don’t just sleep. They sprawl, they burrow, they claim entire corners of the living room like tiny furry landlords. And while store-bought beds are fine, they’re pricey and often not exactly your style. That’s where the humble wooden pallet comes in. I’ve spent way too many weekends turning these free (or nearly free) wooden wonders into cozy, chic, and ridiculously sturdy dog beds. Trust me, once you start, you’ll never look at a shipping crate the same way again.
Whether you’re looking for a rustic farmhouse vibe, a modern minimalist platform, or a raised bed that keeps your pup cool in the summer, there’s a pallet idea here for you. These projects are forgiving, budget-friendly, and most of them only take an afternoon. Grab your sander, your staple gun, and a bag of treats to keep your four-legged supervisor happy while you work.
1. The Classic Raised Platform Bed
This is the granddaddy of all pallet beds, and for good reason. We simply flipped a standard pallet over, sanded the top slats until they were buttery smooth, and added four sturdy furniture legs to the corners. The gap between the floor and the bed is a game-changer for air circulation.
Not only does this keep your dog cool on hot days, but it also saves your floors from muddy paw prints. I topped ours with a thick, washable outdoor cushion from a big-box store. It took about an hour to build, and my golden retriever claimed it immediately. It’s the perfect height for older dogs who struggle to get up from the floor.
For a quick tip: Use furniture pads on the bottom of the legs to protect your hardwood floors and prevent sliding when your pup jumps on and off.
2. The Cozy Crate-Style Hideaway
Dogs are den animals by nature. They love a space where they feel safe and tucked away. To build this, I used four pallets standing on their sides to create a square enclosure. I left the front open, but you could also cut a round archway for a fun entrance.
I lined the inside with a soft fleece blanket and a plush dog bed that fits snugly in the bottom. The thick pallet walls block out drafts and noise, making it the ultimate nap cave. It’s heavy and sturdy, so there’s no chance of it toppling over, even with a hyperactive puppy bouncing inside.
If you want to elevate the look, paint the exterior with a chalky furniture paint. It looks like a piece of custom farmhouse furniture rather than a recycled shipping crate.
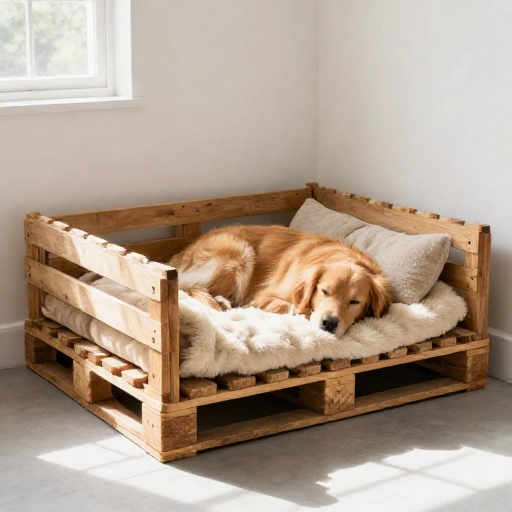
3. The Chic Slatted Modern Lounger
If you want a cleaner, more contemporary look, skip the full pallet and use just the top slats. I carefully pried off the planks from two pallets, cut them to equal lengths, and laid them side-by-side with a small gap between each piece. I attached them to a simple wooden frame.
This creates a beautiful, airy bed that looks like it came from a high-end boutique. The gaps allow for airflow, preventing your dog from overheating. You can leave the wood natural with a clear matte sealant, or stain it to match your existing furniture.
The best part? It’s lightweight enough to move from the living room to the bedroom easily. Just add a slim mattress cushion and you’re done. This is my go-to recommendation for people who want a project that looks difficult but is actually really simple.
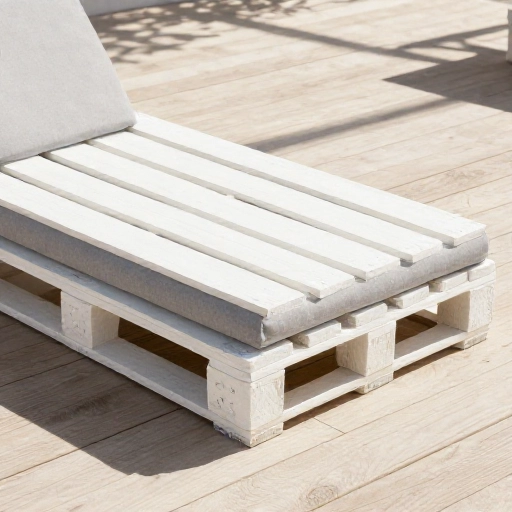
4. The Upcycled Caster Wheel Roller
Got a dog that likes to follow the sun around the room? Then this mobile bed is for you. I built a simple box frame from a pallet and attached four heavy-duty caster wheels to the bottom. Now, I can just nudge the bed with my foot and it glides across the floor.
This is incredibly handy for cleaning. Instead of lifting a heavy bed, you just roll it out of the way to vacuum. I also added a little lip around the edge of the frame to keep the mattress and toys from sliding off during the journey.
Make sure you get caster wheels that lock. You don’t want your pup drifting across the kitchen floor every time they shift in their sleep. It’s a fun, practical twist on the classic platform that adds a little personality to the room.
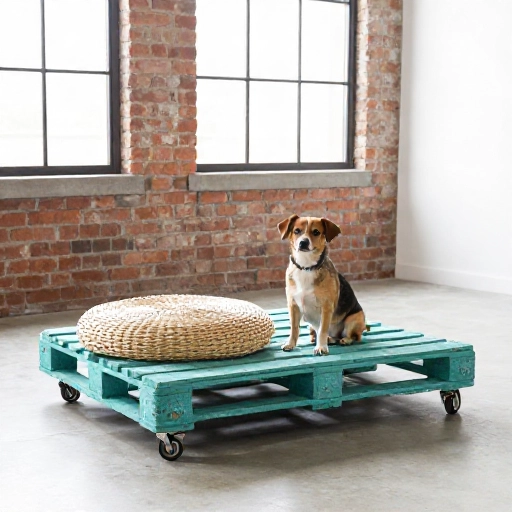
5. The Rustic Rolled-Rim Nest
Some dogs like to rest their heads, and some like to curl up into a tight ball. For the curlers, a flat bed isn’t enough—they need something that hugs them. I took a large square pallet and built up the walls using extra slats, creating a low, bowl-like effect.
I stacked two rows of slats on all four sides to create a rim that’s about six inches high. Then, I filled the inside with a circular, fluffy dog bed. The raised edges give your dog a sense of security and a place to rest their head.
This one is great for small to medium dogs. The high walls block out visual distractions, helping anxious dogs settle down faster. It’s like a crib for your fur baby.
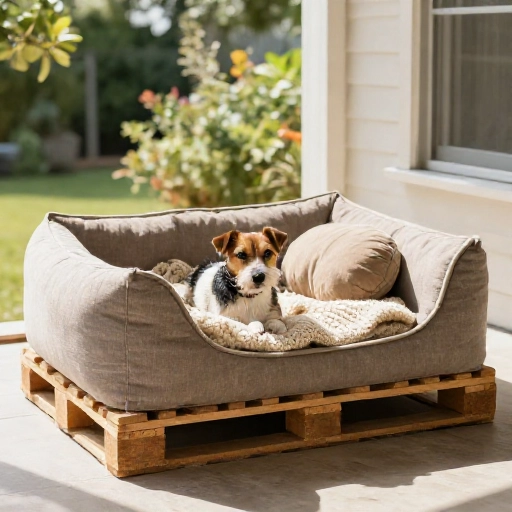
6. The Storage Drawer Dream Bed
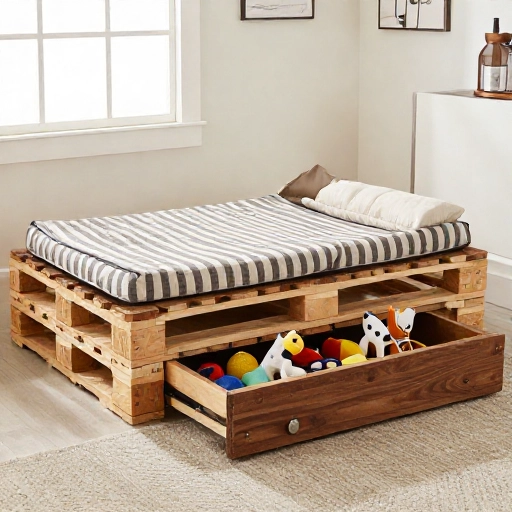
Why waste space under your dog’s bed? This transformation combines a sleeping area with a functional storage solution. I took a standard pallet and built a shallow drawer that slides underneath it, using the pallet’s own height as the drawer housing.
I added a simple wooden handle to the front of the drawer. Now, it neatly stores all of my dog’s leashes, toys, and grooming brushes. It keeps the clutter hidden but within arm’s reach.
This is a lifesaver for small apartments or entryways. The top of the pallet is fitted with a plush cushion, and the bottom drawer is surprisingly roomy. It’s a two-for-one project that maximizes every square inch of your space.
7. The Pallet & Fabric Swing Bed
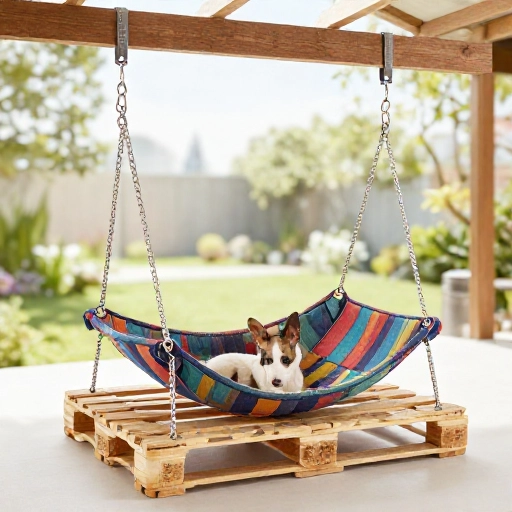
This one is a little unconventional, but it’s a showstopper. Instead of putting the pallet on the floor, I hung it from the ceiling using strong ropes and heavy-duty eye hooks. It creates a gentle swinging bed that dogs absolutely love.
I sanded the pallet thoroughly and sealed it to protect it from the elements, since it’s often near a window. I added a thick mattress and a soft blanket. The slight rocking motion is incredibly soothing—it puts my dog to sleep within minutes.
Safety is key here. You need to ensure the ceiling joist is solid and the ropes are rated for way more weight than your dog. This is a fun weekend project that will be the envy of your dog park friends.
8. The Leggy Boho Daybed
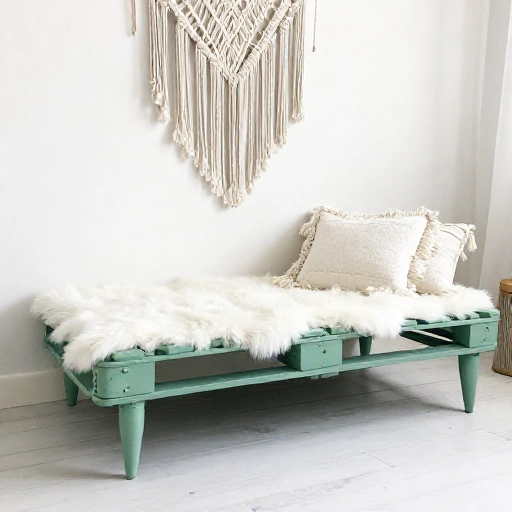
If you love the boho aesthetic, this one is for you. I took a pallet and attached four very long, tapered legs to it to make it look like a daybed. I painted the wood a warm white and added a macrame hanger on the side for toys.
I piled it high with textured cushions, a chunky knit blanket, and a faux fur throw. The height makes it feel like a piece of furniture rather than just a dog bed. It sits nicely next to a sofa or under a window.
The tall legs also make it super easy to clean underneath. I just sweep or vacuum right under it without moving anything. It’s a stylish upgrade that takes about thirty minutes of extra work but adds a ton of visual interest.
9. The Colorful Painted Pop
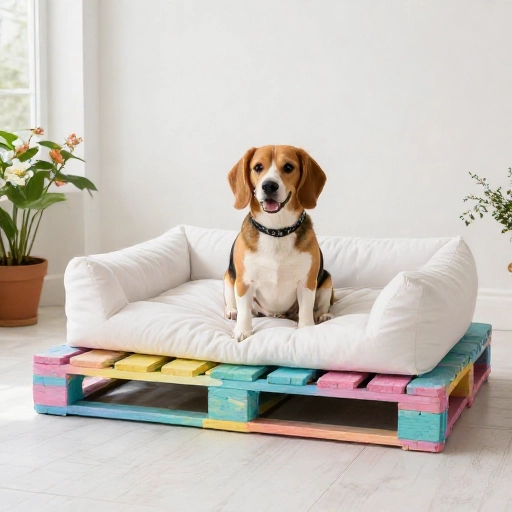
Who says dog beds have to be brown or beige? Let’s have some fun with color. I took a standard pallet and painted it a bright, cheerful turquoise with a glossy outdoor paint. It instantly became the focal point of the room.
I didn’t just paint the outside—I painted the slats on the top too, but in a contrasting pattern. I taped off the planks and painted them alternating stripes of white and yellow. It looks like custom-designed furniture.
This is a great way to use up leftover paint from other home projects. Just make sure you use a pet-safe, non-toxic paint and let it cure for several days before letting your dog sleep on it.
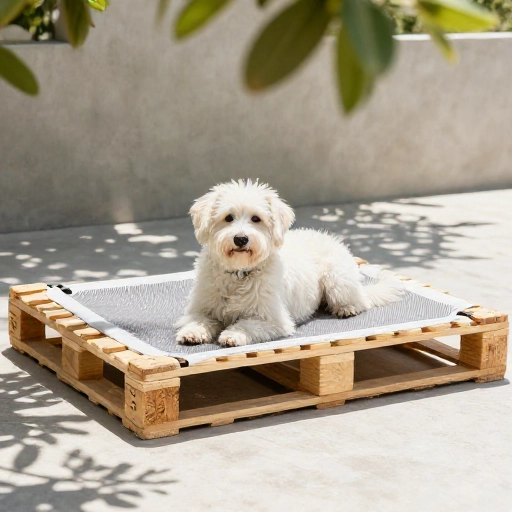
10. The Elevated Cooling Deck
Summer heat can be rough on dogs with thick coats. This build focuses on keeping things cool. Instead of a solid top, I left gaps between the slats that are wide enough for air to flow freely, but narrow enough so my dog’s paws don’t slip through.
I built a low, wide frame and used a mesh-like pattern on top. I also added a cooling gel mat that fits perfectly on the deck. The combination of the open-air design and the cooling mat means my pup stays chilly even on 90-degree days.
This is also a great option for outdoors on a porch or patio. The legs lift it off the hot ground, and the breeze keeps the bugs away. It’s a practical, functional build that solves a very real problem.
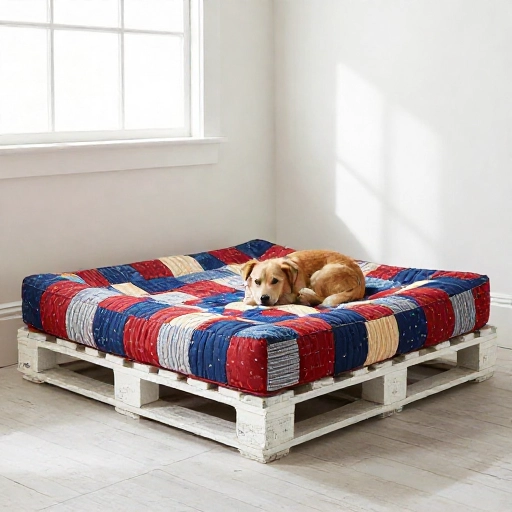
11. The Patchwork Quilt Reclaimed Bed
I love a good farmhouse look, and this one is full of charm. Instead of using one solid pallet, I broke down several pallets and used the individual planks to create a patchwork top. I mixed different wood tones—some stained dark, some left natural, and some painted white.
I arranged them in a checkerboard pattern and glued them to a solid base. The result is a beautiful, rustic mosaic top that looks like it was made from an old barn door. It’s full of texture and character.
I sealed it with a matte polyurethane to protect the different finishes. This is a perfect project for a weekend when you want to get creative and don’t mind a little cutting and measuring.
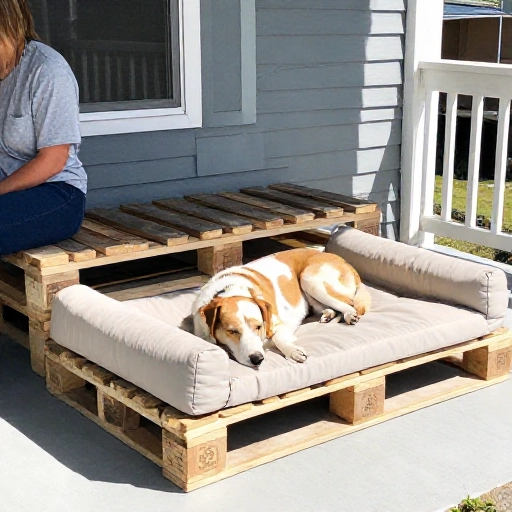
12. The Convertible Bench & Bed Duo
This is for the multi-tasker. I built a base out of two pallets and then added a hinged top. When the top is down, it’s a flat bed. When I lift the top and prop it up with a wooden stay, it becomes a backrest for a bench.
This is perfect for mudrooms or entryways. You can use it as a seat to take off your shoes, and your dog can use it as a bed or a lookout perch to watch you leave. It’s also great for kids to sit on.
The build is a bit more complex due to the hinge mechanism, but it’s a smart use of space. I added a non-slip rug pad to the top so the cushion stays put whether it’s flat or angled.
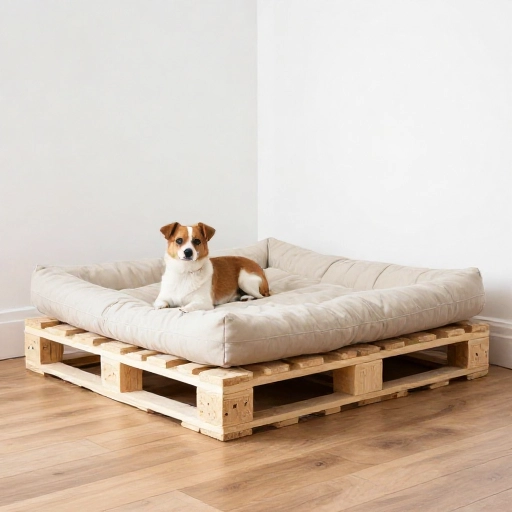
13. The Minimalist Floor Cushion Frame
Last but not least, is the simplest idea for beginners. I took a single pallet, cut it in half, and used those two halves to create a low-profile frame around a thick floor cushion. The pallet pieces act as a border, keeping the cushion from sliding around.
I sanded the frame down and stained it a light oak color. Then I simply dropped in a large, oversized cushion that I bought online. The frame gives it structure and makes it look like a custom-built piece.
This is the perfect “first project” because it’s nearly impossible to mess up. It’s quick, cheap, and looks fantastic in any modern living room. If you’re nervous about power tools, this is the place to start.
Final Thoughts on Your Pallet Project
Turning a pile of old wood into a cozy throne for your furry friend is one of the most satisfying DIY projects out there. It’s budget-friendly, customizable, and honestly, a whole lot of fun. I hope one of these ideas sparks some inspiration for your next weekend build.
Don’t be afraid to make it your own. Mix and match colors, add different legs, or throw in a personalized name plate. The goal is to create something your dog loves and that you’re proud to show off. Happy building!
Frequently Asked Questions
Q: Are pallets safe for dogs?
Yes, as long as you choose heat-treated pallets (look for the “HT” stamp) rather than chemically treated ones. Always sand them down to remove splinters and seal them with a pet-safe, non-toxic finish.
Q: How do I clean a pallet dog bed?
Most pallet beds have removable cushions that you can throw in the wash. For the wooden frame itself, a quick wipe with a damp cloth and a mild soap solution works wonders. Make sure to dry it well to prevent mold.
Q: How long does it take to build?
Most of these projects take between 1 and 3 hours. The simplest builds (like the floor cushion frame) can be done in under an hour, while the more complex ones (like the swinging bed) might take a full afternoon.
Q: What if I don’t have power tools?
You can still do this! Ask your local hardware store to cut the pallet for you, or use a manual hand saw. A sander can be replaced with sandpaper, though it will take a bit more elbow grease.
Q: Can I use this outside?
Absolutely. Just use outdoor-grade paint or sealant to protect the wood from rain and sun. Make sure to add rubber feet to keep the wood from sitting in standing water.