15 DIY Dog Food and Water Station Ideas Your Pup Will Love (and You’ll Actually Enjoy Building)
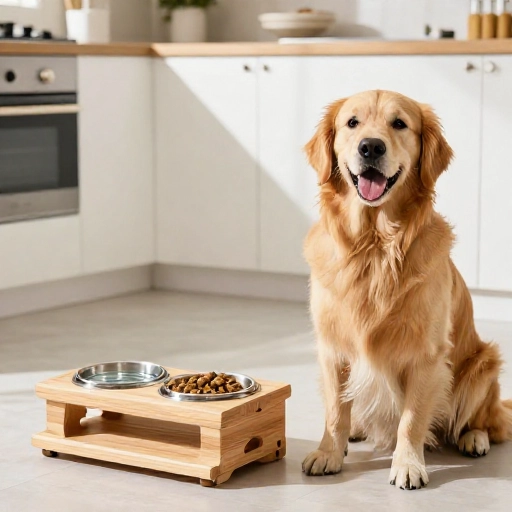
If you’re anything like me, your dog’s eating area probably looks a little chaotic right now. Maybe there’s a water bowl sliding across the kitchen floor, or food scattered everywhere because your pup eats like they haven’t seen kibble in days. Sound familiar? I’ve been there too, and honestly, it wasn’t until I built my first DIY station that I realized how much of a game-changer it is.
Not only does a dedicated station keep things tidy, but it also makes mealtime a whole lot more comfortable for your furry friend. Plus, there’s something so satisfying about creating something with your own two hands that you get to see your pup use every single day. Whether you’re a seasoned woodworker or a total beginner, I’ve got 15 brilliant ideas that range from super simple to seriously impressive. Let’s get into the good stuff and find the perfect project for you and your best buddy.
Why Build a DIY Dog Station?
You might be thinking, “Can’t I just use a bowl on the floor?” Sure, you can, but building a custom station offers benefits that go way beyond just looking cute in your kitchen. It’s one of those small upgrades that makes a big difference in your daily routine and your dog’s health.
For starters, raising the food and water bowls to a comfortable height is a godsend for older dogs or large breeds. It takes the strain off their neck and joints while they eat, which is huge for pups with arthritis or mobility issues. For smaller dogs, a low station can actually help them feel more secure and less vulnerable while they’re eating. It also helps with digestion because they’re not having to crane their neck down to the floor. Plus, a well-designed station contains the mess—no more water splashes on your walls or kibble rolling under the fridge!
Essential Tools & Materials for Your Build
Before you dive into these 15 ideas, let’s talk about what you’ll need. The beauty of DIY is that you can scale your tools to your skill level. Most of these projects are beginner-friendly and only require a few basic things that you might already have lying around the house.
Here’s your go-to list to get started:
- Measuring tape: To get the perfect height and spacing for your specific dog’s bowls.
- Pencil and paper: For sketching out your design and jotting down measurements.
- Handsaw or circular saw: For cutting wood to size. If you’re a beginner, a simple handsaw is totally fine.
- Drill and drill bits: Essential for making pilot holes and driving screws, which prevents the wood from splitting.
- Sandpaper or an electric sander: This is non-negotiable! You want to make sure there are no splinters that could hurt your pup’s paws.
- Wood screws and wood glue: For securing the pieces together firmly.
- Non-toxic, pet-safe paint or sealant: This is super important. You must make sure whatever you use to finish the wood is safe for animals.
Ingredients & Materials: Choosing What Works Best
Okay, so “ingredients” for a DIY project means materials! The type of wood or material you choose will really dictate the look and durability of your station. Don’t stress too much—there’s a perfect option for every budget and style.
Here are some of my favorite materials for these projects:
- Pine or Plywood: This is your best bet for a budget-friendly and easy-to-work-with option. It’s lightweight, easy to cut, and takes paint beautifully.
- Oak or Hardwood: If you want something that will last for decades and looks absolutely stunning, go for hardwood. It’s heavier and a bit harder to work with, but the result is a piece of furniture.
- MDF (Medium-Density Fiberboard): This is super smooth and inexpensive, making it great for painted projects. Just be aware it doesn’t handle water as well as sealed wood.
- Repurposed Furniture: This is where the real magic happens! You can transform an old nightstand, a wooden crate, or even a wine rack into a unique and trendy dog station with just a little bit of paint.
- Stainless Steel Bowls: You’ll want to pick your bowls first. Stainless steel is the best choice because it’s durable, easy to clean, and won’t harbor bacteria like plastic can.
How to Build Your Perfect Dog Station
Now for the fun part! Here are a few of my favorite DIY approaches that you can customize. Remember, the golden rule is to measure your dog’s back height first. The top of the bowl should be roughly at their chest level. Let’s break down a simple, classic design that you can build in an afternoon.
Here’s a step-by-step guide for a basic two-bowl wooden stand:
- Measure Your Dog: Measure from the floor to the top of their shoulders (withers) and subtract about 5 inches. That gives you the height the bottom of the bowl should sit at.
- Cut Your Wood: You’ll need two side panels, one top panel, and one bottom panel. The top panel needs to be long enough to hold both bowls side-by-side with a little gap between them.
- Trace and Cut the Holes: Place your bowls upside down on the top panel, trace around them, and then cut out the holes with a jigsaw. Make sure the holes are slightly smaller than the bowl’s lip so they sit snugly inside.
- Sand Everything Down: This is the most important step! Sand every single edge and surface until it’s buttery smooth to the touch.
- Assemble: Attach the top panel to the two side panels using wood glue and screws. Then, attach a bottom panel for extra stability if you like.
- Finish and Seal: Apply a non-toxic, pet-safe paint or sealant. Let it dry completely before letting your pup use it.
Feeding Guidelines & Storage Tips
Once your beautiful station is all built and sealed, it’s time to put it to work! How you use and maintain it is just as important as how you built it. You want to make sure it stays clean and safe for years to come.
Here are my top tips for keeping it in tip-top shape:
- Daily Cleaning: Wipe down the bowls and the surrounding area every day. A simple damp cloth and some mild dish soap will do the trick.
- Deep Clean: Once a week, take the bowls out and give the station a good wipe down with a pet-safe cleaner to get rid of any stuck-on grime or drool.
- Check the Seal: If you notice any chipping or wear in the finish, reapply a fresh coat of sealant to prevent water damage.
- Placement: Put the station in a cool, dry spot away from direct sunlight and high-traffic areas. You want your dog to feel calm and relaxed while they eat.
Final Verdict: Is It Worth the Effort?
In my honest opinion, absolutely. 100% yes. Building a DIY dog food and water station is one of those projects that gives you so much back for the little bit of effort you put in. It’s practical, it saves your floors from messes, and it adds a really personal, loving touch to your home.
And let’s be real—seeing your dog happily munching away from a station you made with love is one of the best feelings in the world. It’s also a fantastic conversation starter when friends come over! So grab your tools, pick the idea that speaks to you, and get ready to make something amazing for your four-legged family member. Your pup will thank you for it.
FAQ: Your Questions Answered
1. What is the ideal height for a dog food station?
Generally, the top of the bowl should be level with your dog’s lower chest. Measure your dog from the floor to the top of their shoulders (withers) and subtract 4-6 inches. That’s your target height.
2. Is it better to use wood or plastic for a DIY dog station?
Wood is almost always the better choice for a DIY project. It’s more durable, looks nicer, and is easier to seal against moisture. Avoid using plastic for the frame as it can be brittle and less stable.
3. Are raised dog bowls bad for dogs?
For most healthy dogs, raised bowls are perfectly fine and can even aid in digestion. However, for dogs prone to bloat (like large, deep-chested breeds), some vets recommend floor-level bowls. Always check with your vet if you have concerns about your specific breed.
4. What is the best material for dog bowls to use in a station?
I always recommend stainless steel. It’s non-porous, which means it won’t harbor bacteria, it’s easy to clean, and it’s super durable. Ceramic is a good second choice, but make sure it’s lead-free and chip-resistant.
5. Can I just use a plastic bin or crate as a base?
Absolutely! That’s a super clever and budget-friendly idea. Just make sure the bin is sturdy enough to hold the weight of the water. You can cut holes in the lid to drop the bowls in, and it’s naturally elevated.