7 Cheap Dog Kennel Plans with Roofing (That Look Good in Your Yard)

Okay, let’s be honest. Dog kennels from the big box stores are either flimsy or wildly overpriced. I spent a whole weekend pricing them out for my Labrador, and I almost choked on my coffee. The good ones were pushing $500, and the cheap ones looked like they’d collapse in the first rainstorm. So, I did what any stubborn DIYer would do—I grabbed a pencil, some scrap wood, and started sketching.
Building your own kennel with a roof isn’t just about saving money (though that’s a huge perk). It’s about making something that actually fits your dog, your yard, and your aesthetic. You get to choose the height, the shade, and the sturdiness. Here are seven budget-friendly plans I’ve either built myself or tweaked from friends’ builds. They all keep your pup dry and cool without emptying your wallet.
1. The Lean-To Shade Shelter
This is the simplest build on the list, and it’s perfect if you just need a cool spot against an existing wall or fence. It’s basically a slanted roof supported by two posts. It doesn’t enclose the dog; it just gives them a shady escape from the sun and a dry spot when it drizzles.
I used 2x4s for the frame and a piece of corrugated plastic for the roof. The key trick? Angle the roof so water runs off the back, not into the middle of your yard. You can even use an old shower curtain as a side flap if you want to block wind.
Cost-wise, this one is a steal. You might even have the lumber left over from another project. It took me about two hours to cut and screw together, and my dog took to it immediately because it’s open on all sides—no “cage” feeling.
2. The Pallet Kennel Hideaway
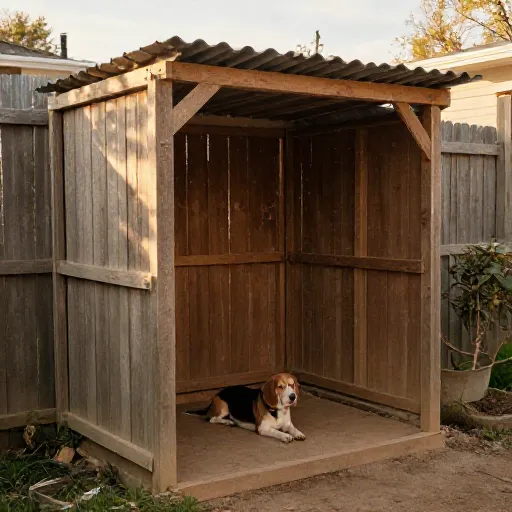
If you want free materials, this is your plan. Pallets are everywhere—behind grocery stores, on Facebook Marketplace, and in construction dumpsters. You’ll need about six of them. I disassembled mine carefully to save the good boards, but honestly, you can just screw the pallets together as-is for a rustic look.
I built a simple box shape, leaving one pallet as the floor (after sanding it smooth) and two as walls. For the roof, I used a half-sheet of plywood and covered it with a cheap tarp stapled down. It’s not the prettiest thing, but it’s solid and costs almost nothing.
Just be careful with the wood—make sure there are no chemical treatments or splinters. Give it a good sanding and a coat of outdoor paint to seal it. This is a great weekend project that feels super rewarding when you spend zero dollars.
3. The Elevated A-Frame
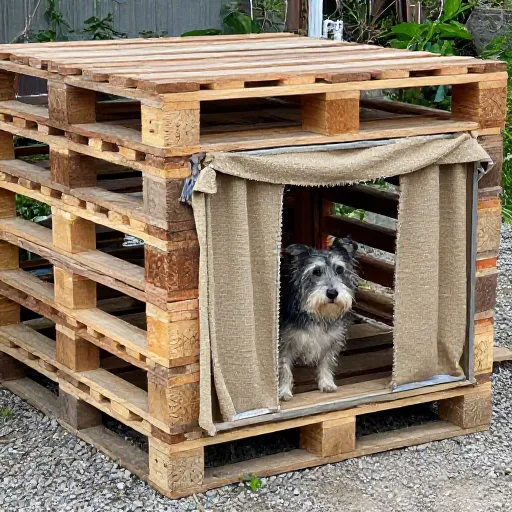
This one looks super cute but is actually incredibly practical. The A-frame design sheds rain and snow like a champ, and elevating it off the ground keeps the floor dry and cool in summer. It’s a classic for a reason. I built this for a friend’s beagle, and it’s held up through three harsh winters.
You need two sheets of plywood for the sides, cut into triangles, and a ridge beam at the top. The floor sits about six inches off the ground on simple legs. The roof is just more plywood hinged at the top so you can flip it open for easy cleaning.
Use exterior-grade screws and paint the inside with a waterproof sealant. It’s a bit more measuring than the lean-to, but the classic shape looks intentional in any landscape. Plus, dogs love feeling like they have a little “cabin.”
4. The Chain-Link Runner Combo
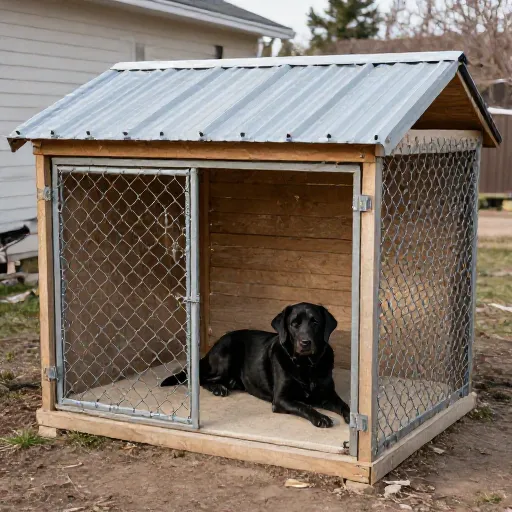
Sometimes you need a kennel that gives your dog room to run, not just a place to nap. This plan uses a simple wooden roofed shelter attached to a chain-link dog run. The trick is to build the shelter *inside* the run, so the dog has a warm bed while still having space to roam.
For the shelter, I used plywood walls and a flat roof with a slight pitch. I used a dog door flap to keep the wind out. The run itself is just a kit you can buy cheaply, but the roofed house is custom. This setup is perfect for high-energy dogs that need to be outside while you’re at work.
The budget hack here is to buy the chain-link panels secondhand. People sell them all the time when they move. I got a full 10×10 run for $40, and the wood for the house cost me about $60. Total project was under $100.
5. The Repurposed Dresser Kennel
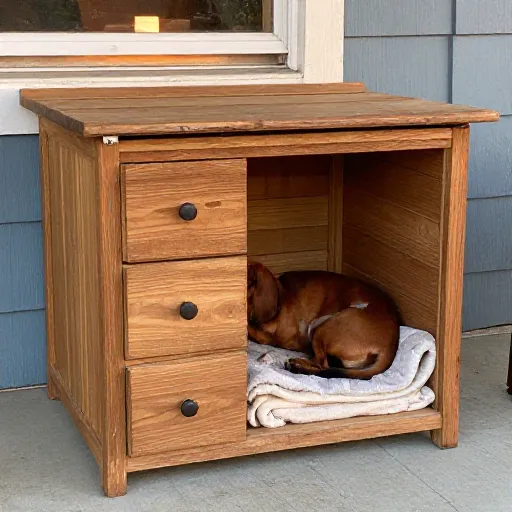
This is my favorite “upcycle” idea. I found a solid wood dresser at a thrift store for $15. It was ugly—some kind of orange stain—but the structure was solid. I took out the drawers, flipped it on its back, and cut a doggy door into the side panel that used to be the top.
I reinforced the corners with brackets and added a hinged door on the front so I could easily wash the inside. For the roof, I screwed a piece of plywood onto the bottom of the dresser (which was now on top) and covered it with asphalt shingles I had leftover from a repair.
It looks like a tiny house! It’s insulated, heavy, and won’t blow over in a storm. I added a little porch with a scrap piece of wood. It’s the most unique kennel on my street, and it cost less than $30 to make.
6. The PVC and Tarp Pop-Up
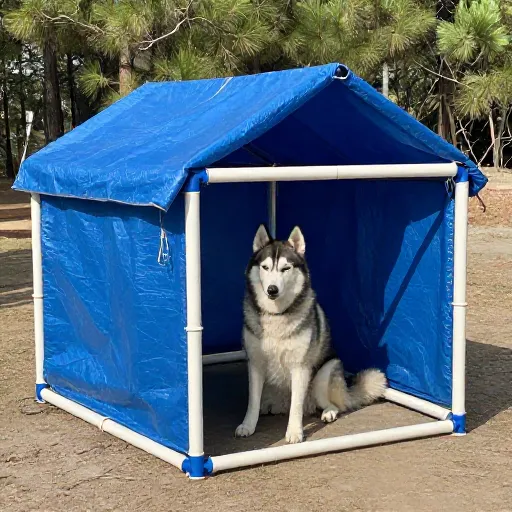
This is less of a permanent “kennel” and more of a temporary sunshade, but it’s perfect if you need something portable or if your dog spends time at a cabin or camping. I built a frame out of 1-inch PVC pipes and elbows. It’s a simple cube shape, about 4x4x4 feet.
For the roof, I used a heavy-duty tarp and bungee cords to attach it. The sides can be left open for airflow or you can clip on a second tarp for wind protection. It weighs about ten pounds and breaks down flat for travel.
This is the cheapest option on the list—just the cost of PVC and a tarp. It’s not chew-proof, so skip this if your dog is a destroyer. But for a calm dog that just needs shade, this is a brilliant, fast, and cheap solution.
7. The Skid-Sized Dog House
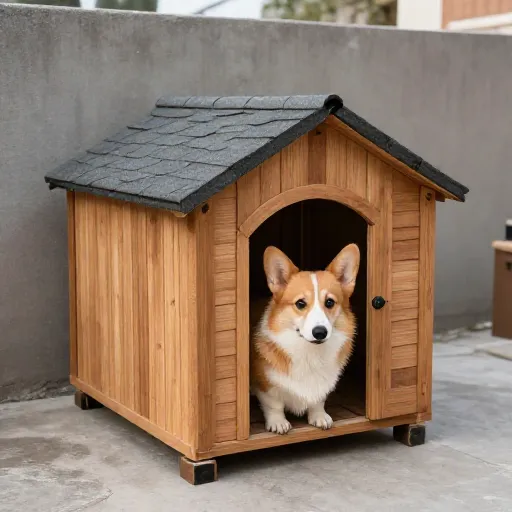
This plan is for the bigger breeds. Standard dog houses are often too small for a Great Dane or a Mastiff. I built this on a 4×4 wooden skid (the kind used for shipping bags of mulch). It gives you a massive footprint for cheap and keeps the floor off the cold ground.
I framed up walls on top of the skid, leaving a 2-foot gap for a doorway. The roof is a simple flat design with a slight pitch to the rear. I used tongue-and-groove boards for the walls because they look nicer and lock together for strength.
The best part about using a skid is that the bottom slats are already spaced for airflow, which prevents rot. I just added a piece of plywood on top of the skid for a smooth floor and put a thick outdoor rug on it. This is a heavy, sturdy build that will last a decade.
Final Thoughts on Building Cheap
Don’t get overwhelmed by the idea of “construction.” Every one of these plans is just a box with a lid. If you can measure and use a drill, you can build any of them. The secret is to not overthink it. Your dog doesn’t care if the corners are perfectly square; they just care that they have a safe, dry spot to curl up.
My biggest advice is to keep an eye on curb alerts and salvage stores. Wood is the most expensive part, so finding free pallets or old furniture cuts your budget in half. And remember, a coat of paint makes everything look ten times more expensive than it was.
Frequently Asked Questions
1. What is the cheapest roofing material for a dog kennel?
Corrugated plastic or a simple heavy-duty tarp is the cheapest. If you want something more permanent, look for leftover asphalt shingles or even a piece of tin roofing from a salvage yard.
2. Should I insulate the kennel?
Only if you live in extreme climates. For most places, a wooden floor and a solid roof are enough. If you do insulate, use foam board and cover it with plywood so your dog can’t chew it.
3. How do I keep the kennel from blowing over in the wind?
Make sure the base is heavy. For the A-frame, use sandbags on the bottom edges. For box kennels, build a floor and fill it with a few bricks or pavers underneath. Or, drive stakes into the ground through the floor frame.
4. What is the best wood to use for an outdoor kennel?
Cedar and redwood are naturally rot-resistant but pricey. Pressure-treated pine is the budget-friendly choice. Just make sure you let it dry out completely before painting, and never use treated wood for a dog bed they might chew on directly.
5. How big should the kennel be?
The dog should be able to stand up, turn around, and lie down flat comfortably. Don’t make it too big, or it won’t hold your dog’s body heat in winter. Measure your dog from nose to tail and add 6 inches for the length.